MEDIAL v5 to v6 Upgrade
This topic discusses how to upgrade MEDIAL from version 5 to version 6. If the version of MEDIAL is less than version 5 then contact Support for assistance in upgrading.
Before upgrading ensure that the server has .NET version 4.6.1 installed (Windows Server 2008 and 2012). The update can be downloaded from here.
Backing up the system
Before running the update, the system needs to be backed up in case of an upgrade failure.
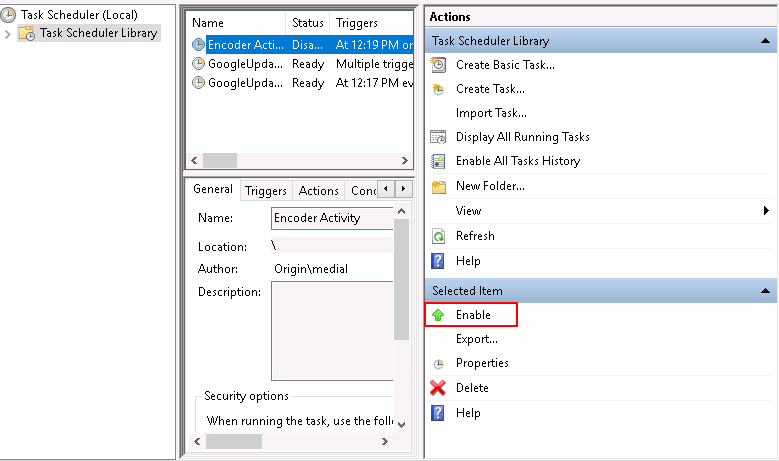
Stop the Encoder Activity scheduled task
Locate the Task Scheduler in Windows and open it.

Locate and disable the Encoder Activity scheduled task.
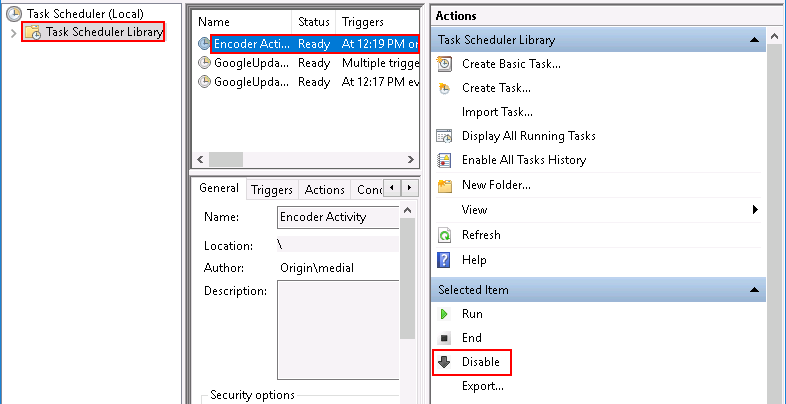
Minimize the Task Scheduler window for later.
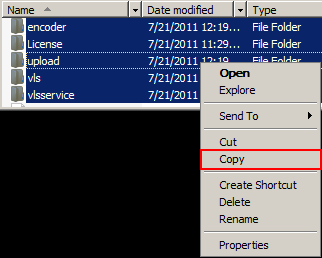
Back up the MEDIAL directories
Navigate to the installation directory of MEDIAL. Typically this will be as follows, but in some cases it might be on a different drive: C:\MediaLibrary. Create a backup directory for the files, and then copy the 5 folders inside the media library directory into the backup folder.
Back up the VLS Database
In some cases the VLS database will be hosted remotely on an SQL cluster. In this case it is likely that the database is backed up as part of a daily backup schedule, however this should be checked with a DBA prior to performing the MEDIAL upgrade. If a backup was taken automatically on the day of the upgrade, but several hours beforehand, content may have been uploaded to the system since. It therefore may be prudent to perform another one-off backup to ensure that the very latest copy of the data is available should a problem occur during the upgrade, and a roll-back is needed.
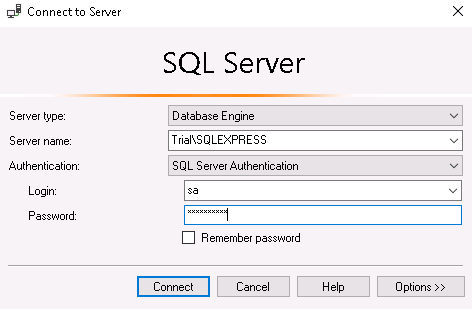
To back the database up, open the SQL Server Management Studio, and log in using the 'sa' account, or an account that has full access to the VLS database.
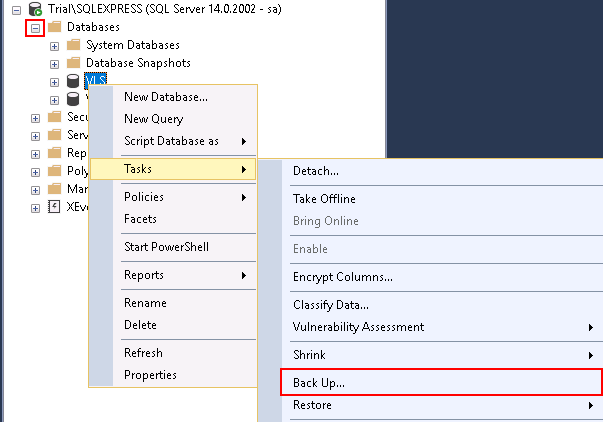
Once logged in expand the Databases node, and then right-click the VLS database. Click Tasks and then click on Back Up...
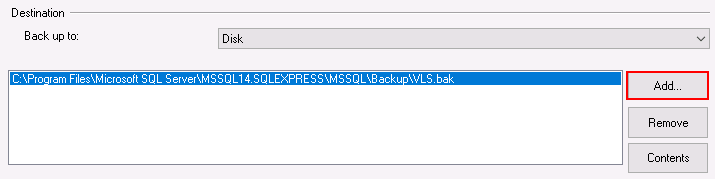
When the Backup window opens, ensure that the location is set to Disk, and click Add to add the backup path. Call the file the name you wish to use for the backup, followed by '.bak'.
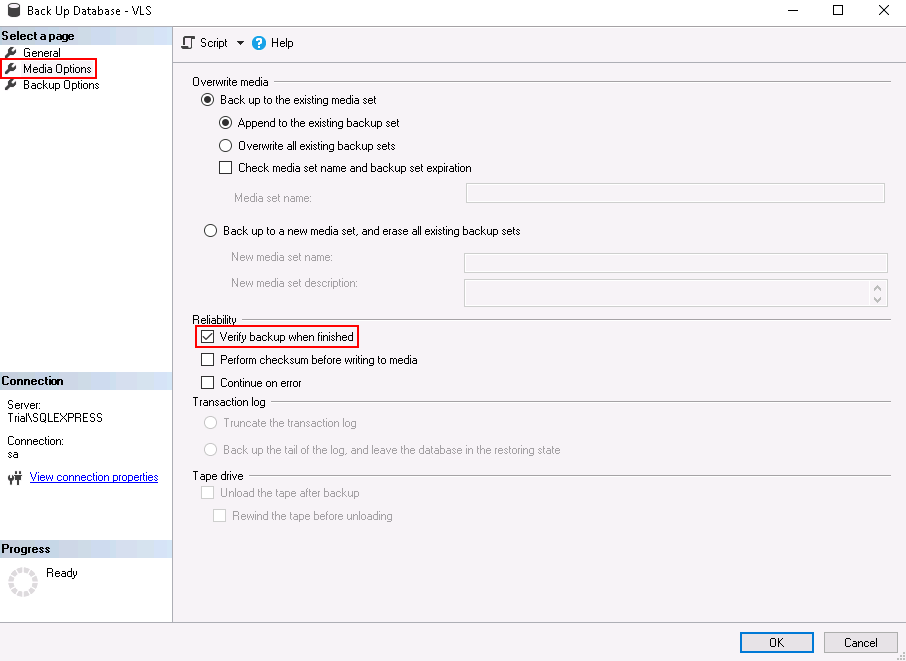
Click on the Media Options menu on the left-hand side of the window and set the backup job to verify the backup once it is finished. Click OK to begin the backup with verify job.
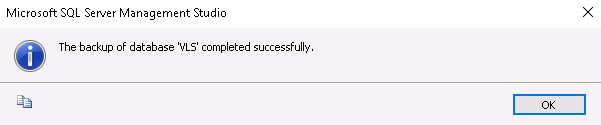
Once the backup is finished click OK on the success message.
Exit SQL Server Management Studio.
Running the Updater
With the system fully backed up, the upgrade can begin. Download the latest update manager from the self-service portal, or the one supplied to you by MEDIAL.
For access to the self-service portal please contact the Support team, who can enable access to it and provide you with the login details.
Ensure that you have your version 6 MEDIAL license ready before upgrading. This must be present on the server as the update manager will ask for it during the upgrade process. If you require a license, please visit the self-service support portal or contact the Support team at MEDIAL.
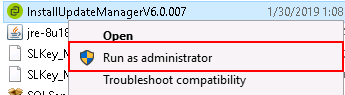
Right-click the update manager and click Run as administrator.
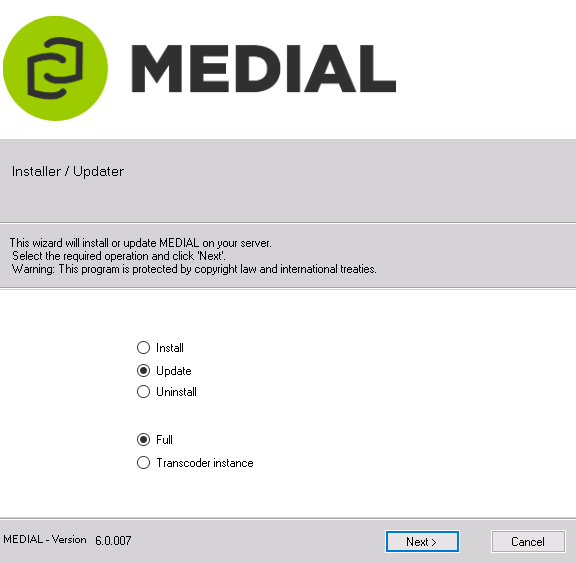
When the updater opens it will default to the Update option if MEDIAL is installed to the default location of C:\MediaLibrary. If MEDIAL is installed to a different location then it will default to Install.Ensure to change the radio button to Update before proceeding. Leave the second option set to Full to perform a full upgrade of the system. Click Next.
At the license agreement screen, read and agree to the license terms and click Next to continue.

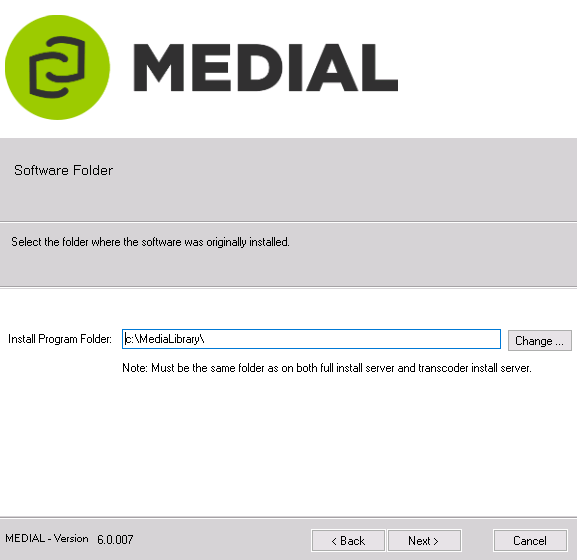
The default MEDIAL installation directory will be displayed in the Install Program Folder: text box (C:\MediaLibrary). If MEDIAL is installed to a different location, click the Change... button and locate the MediaLibrary folder and click OK to select it. Click Next to continue.
The next screen will require Windows credentials in order to proceed. If the account is local then just specify a username and password. If the Windows account to be used is a domain account specify the username as follows: domain\username

Locate the version 6 MEDIAL license by clicking Browse and selecting it. The display language can also be set to the desired country. Click Next to continue.

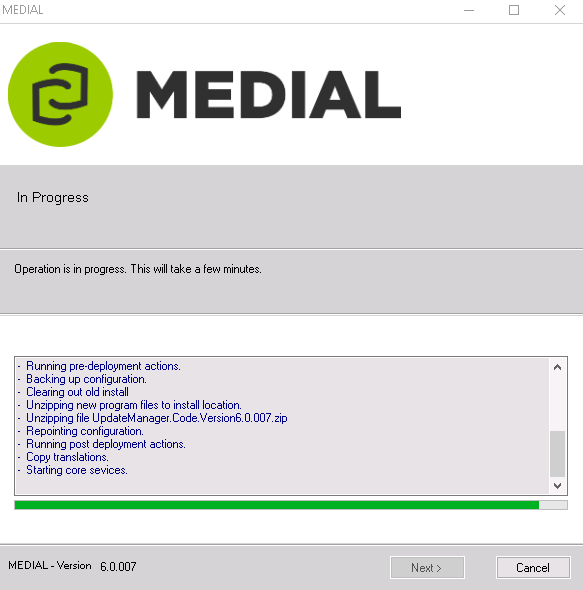
The update will begin and the process will be displayed as the updater goes through the necessary steps.
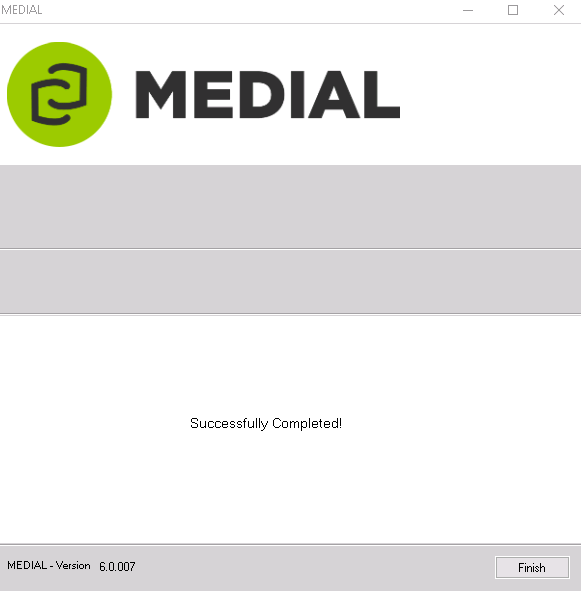
Once the update is complete click on Finish to complete the upgrade.
With the upgrade successfully complete, start the Encoder Activity scheduled task by opening Windows Task Scheduler, and selecting and enabling the Encoder Activity task.
How to Roll Back an Unsuccessful Upgrade
This section explains how to roll back to the previous version of the media library if the upgrade was unsuccessful or if there a problem with the software following the upgrade.
To begin the process of rolling back the media library:
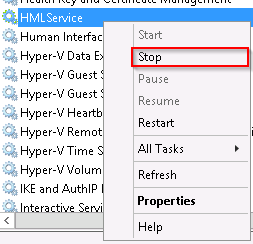
- Click on Start, then Administrative Tools, and open Services.
- Stop the service called HMLService.
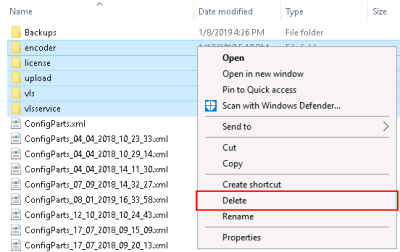
- Navigate to the MEDIAL installation directory e.g.: C:\MediaLibrary, and delete the following folders: vls, upload, vlsservice, encoder and license.
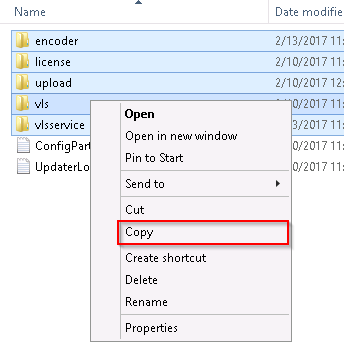
- Restore the backed up media library to the original location (for example, C:\MediaLibrary) by copying over all the folders previously copied earlier in this document (vls, upload, license, vlsservice and encoder).
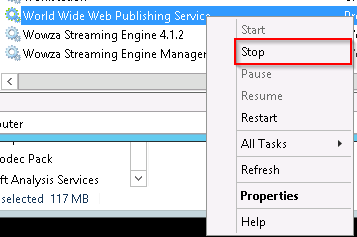
- Open Services again and locate and stop the World Wide Web Publishing service.

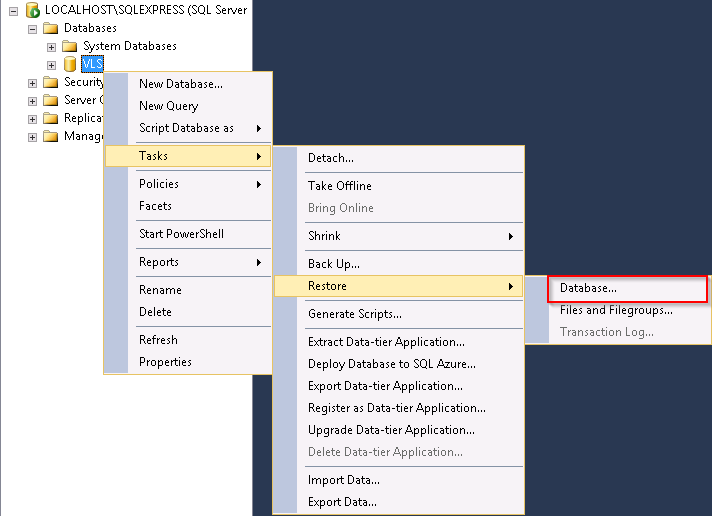
- To restore the previous VLS database, log into SQL Management Studio and expand the server node, and then the databases node.
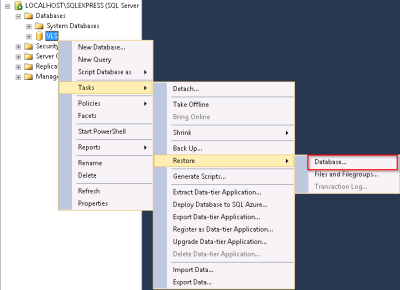
- Right-click the VLS database, then click Tasks, then Restore, and then Database…
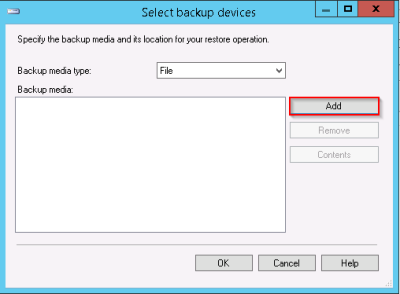
- In the Restore Database window that opens, select From device… for the source and then click the ellipsis to select the backup made prior to upgrading.

- Click the Add button.
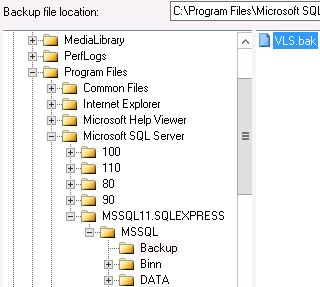
- Locate the VLS backup.
- Check the box in the Restore column for the backup once it has been selected.

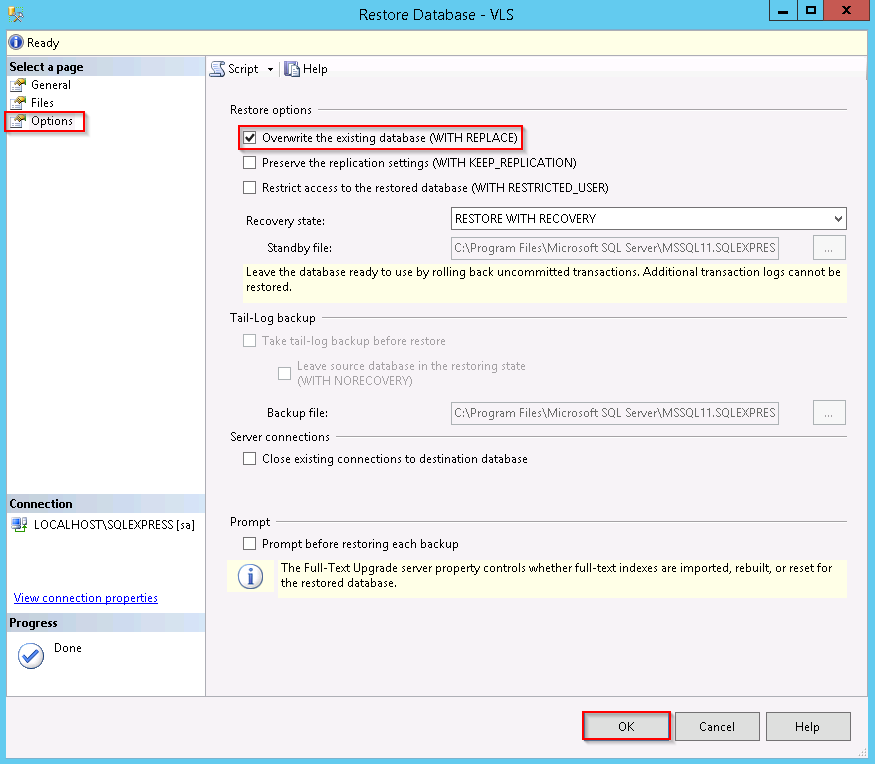
- Click on Options, then check the box to Overwrite the existing database (with replace). Click OK to restore the database.

- Exit SQL Management Studio.
- Load Services by clicking Start, Administrative Tools, Services.
- Start the World Wide Web Publishing and HML Service.
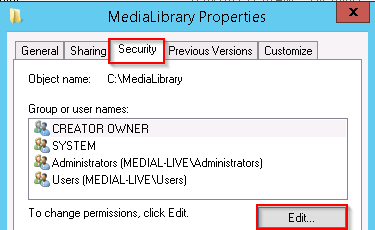
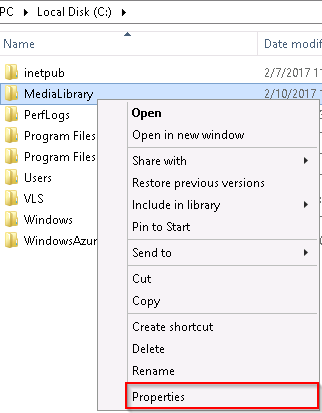
- Set the permissions on the Media Library installation directory by navigating to it (for example, C:\MediaLibrary) and then right-clicking it and selecting Properties.

- Click on the Security tab. Check to see if the Network Service account is listed in the access list. If the account is present ensure it has Read & Execute rights. If it isn’t present in the list do this:
- Click Edit.
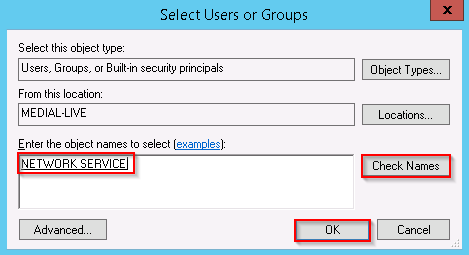
- In the window that appears, click Add.
- Enter the name of the account and click Check Names. In this case type network service. Click OK.

- Select the Network Service account and check the box to allow Read & Execute permissions, then click OK.

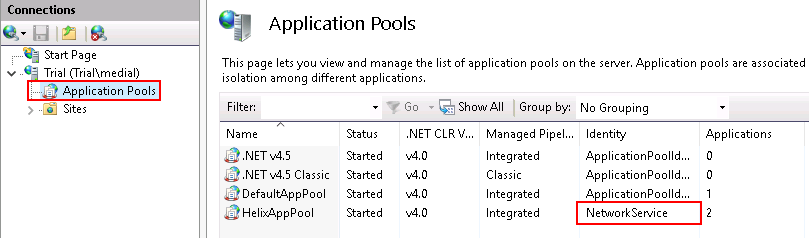
In some cases the media library uses a different account to run under. In this case, this account should be specified in the access control list for the media library directory with the Read & Execute permission. To find out which account should be used for the permissions, open IIS and expand the Application Pools node on the left-hand side. Check to see which account is being used for the HelixAppPool, and use this one for the directory permissions.

- Click Edit.
- Click OK on the Properties box to exit.
- The MEDIAL restore should now be complete. Load the sites to check they are fully working.


|
©2025 Streaming Ltd | |