Moodle Plugin
This guide contains instructions on how to install the Moodle plugin on your Moodle environment to integrate with your MEDIAL instance. Alternatively if you are trialing the plugin, it contains instructions on how to install it using
our trial MEDIAL instance.
This video playlist demonstrates the use of the Moodle Plugin from both a Teacher and a Student perspective.
Install the Moodle Plugin
The Moodle plugin set can be installed in two ways. It can be installed by obtaining it from the MEDIAL PAM site, or by logging onto Moodle.org and installing the plugin elements to your registered site(s).
Perform the following steps to install the Moodle plugin.
- Download the MEDIAL Moodle Plugin Set by clicking here.
-
Unzip the main zip file, which contains the following zip files:
- 1 - medial_activity.zip
- 2 - medial_assign_submission.zip
- 3 - medial_tinymce.zip
- 4 - medial_atto.zip
- 5 - medial_assign_feedback.zip
-
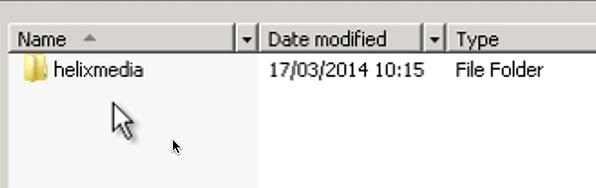
Unzip 1 - medial_activity.zip. It contains a folder called helixmedia.
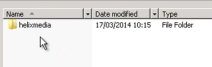
- Copy this folder into the mod directory of your Moodle installation (htdocs/mod).
-
Log in to Moodle as an Adminstrator and upgrade the Moodle database when prompted:

-
Unzip 2 - medial_assign_submission.zip. It contains a folder called helixassign.
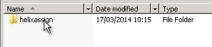
- Copy this folder into the Submission directory of your Moodle installation (htdocs/mod/Submission).
-
Log in to Moodle as an Administrator and upgrade the Moodle database when prompted.
-
Unzip 3 - medial_tinymce.zip. It contains a folder called helixmedia.
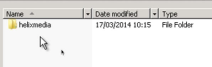
Although this folder has the same name as the folder in 1 - medial_activity.zip, it is a different component that must be installed separately.
- Copy this folder to htdocs/lib/editor/tinymce/plugins.
- Log in to Moodle as an Administrator and upgrade the Moodle database when prompted.
-
To enable the plugin so it can be used in the editor, go to the following area in Moodle:
Home > Site administration > Plugins > Text editors > TinyMCE HTML editor > General settings
-
In the Settings area, add the following into the Editor toolbar text box at the end of the third paragraph:
helixmedia,|,codeModule provided by Streaming LTD http://www.streaming.co.uk
-
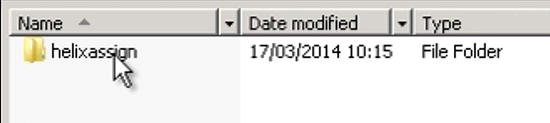
Unzip 5 - medial_assign_feedback.zip. It contains a folder called helixfeedback.

-
Copy this folder to the following directory on the Moodle server:
htdocs/mod/assign/feedback
-
Log into Moodle as an Administrator and upgrade the Moodle database when prompted.


Install the ATTO Plugin
If the ATTO text editor is being used, install the ATTO plugin:
- Unzip the 4 - medial_atto.zip file.
-
Place the folder named helixatto in the following directory on the Moodle server:
\htdocs\moodle\lib\editor\atto\plugins\
- Log into Moodle as an Administrator and upgrade the Moodle database when prompted.
-
Configure the plugin by navigating to this area:
Home / > Site administration / > Plugins / > Text editors / > Atto HTML editor / . Atto toolbar settings
- On the following line, add helixatto as shown below and save the changes:
-
files = image, media, managefiles, helixatto
- Log on to Moodle.org.
- Scroll to the bottom of the page and click on Plugins under DOWNLOADS.
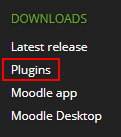
- Enter 'MEDIAL' in the search box and click on Search.

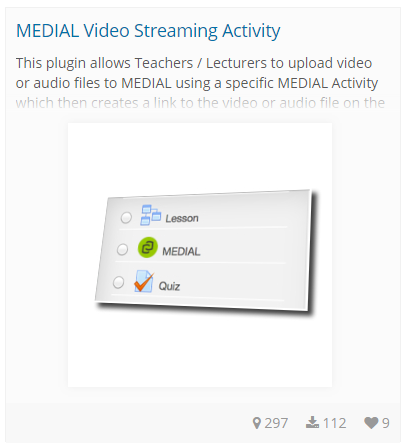
- There are 5 plugin elements which can be installed: MEDIAL Video Streaming Activity, MEDIAL TinyMCE Editor, MEDIAL Video Streaming Assignment Activity, MEDIAL ATTO Editor and the MEDIAL Video Feedback Plugin.

Not all of the plugin elements need to be installed. As a minimum, the MEDIAL Video Streaming Assignment Activity must be installed so it can be configured in Moodle. If only the ATTO editor is used in Moodle however, the TinyMCE Editor plugin may not need to be installed.
- Click on the MEDIAL Video Streaming Activity plugin.
- Click on Install Now.
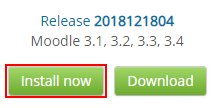
- Next to the correct Moodle site click on Install Now.

- Follow the on-screen instructions and complete the install.
- Repeat the steps above to install the other desired plugin elements.


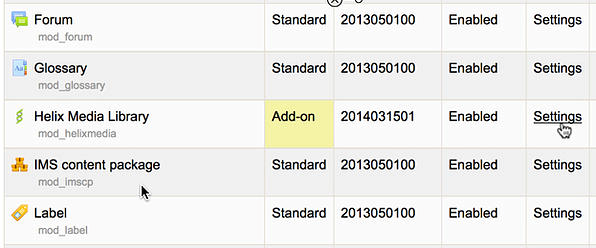
Configure the Plugin
- Log in to Moodle as Administrator.
- Navigate to Site Administration > Plugins > Plugins Overview.
-
Click on Settings where you see the mod_helixmedia plugin.

-
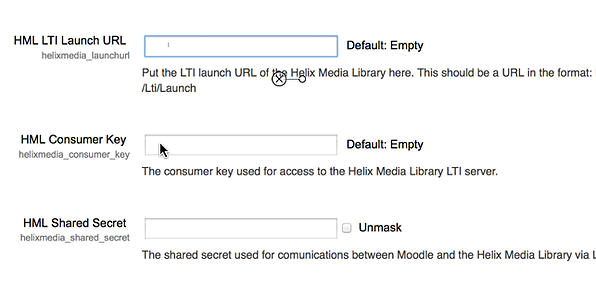
Type in URL, key, and secret for your MEDIAL instance.

Existing Customers
-
The HML LTI Launch URL is the back-end URL of your MEDIAL instance appended with /Lti/Launch. For example:
https://mediaupload.university.edu/Lti/Launch
The key and secret values match those set in the Learning Tools Interoperability section of MEDIAL security section.
Ensure that the L's for Lti and Launch are uppercase
Trial Users
- If you are a trial user, set the HML LTI Launch URL to:
https://na1upload.medialibrary.com/Lti/Launch
-
-
The HML Consumer Key and HML Shared Secret fields should be filled out with the key and secret contained in the Moodle trial email you received after registering for the trial. If you have yet to register and have not received an email containing the key and secret, please fill out the Moodle trial form here.
- Click Save at the bottom of the Moodle settings page.
Ensure that the L's for Lti and Launch are uppercase
Add a Delay to the Video Dialog
When a student responds to an assignment using the green Browse/Upload button, the window by default closes immediately once the file submission has completed.

In order for the assignment to be submitted within Moodle so that it appears in the Grade Book, the student must click Save at the bottom of the assignment page. For this reason, you can configure a delay of any number of seconds to keep the window open after the video is uploaded. Set the value to -1 if you want to keep the window open until the student closes it manually.

You can also change the text that appears before the window closes. For example, you could place text in this window that tells the student You must click Save at the base of the Assignment page to successfully submit your video response. Click Save Changes at the bottom of the screen when you are finished.
Test the Plugin
- Log in as a teacher and navigate to a course page.
- Click Turn Editing On.
- Click Add an Activity or Resource.
- Select Assignment from the activity list.
- Type in the name of the assignment and click the MEDIAL button on the editor.
- A new window allows you to upload a video item. If the system is configured to use AD/LDAP in the MEDIAL LTI settings, enter your Active Directory or LDAP credentials to continue. Otherwise, you will be registered automatically as a new user on MEDIAL.
- Complete the upload process.
- Click Insert at the bottom of the window (if required).
- Your new media item will appear in the Text Editor area.
-
Click Save and Return to Course at the bottom of the page.
The plugin can also be used by students to make video submissions in response to video assignments set by teachers.
When testing the Moodle Plugin, please be sure to log in with accounts that are specifically assigned with Teacher or Student Roles. Switching Roles whilst testing the Plugin with a single user account is not supported.
How to Set up Filters in Moodle
In Moodle a MEDIAL module can be added for filters to allow the MEDIAL plugin to be used to embed clips into Forums. The following guide explains how this can be done. Please contact support to request the filter module, or download it from the Moodle.org website.
1a. - Install the plugin on the Moodle server
Log onto the Moodle server, and unzip the MEDIAL filter zip file into the 'filter' folder, which should be located in the following directory: htdocs > Moodle > filter. The unzipped folder should appear as 'medial'.

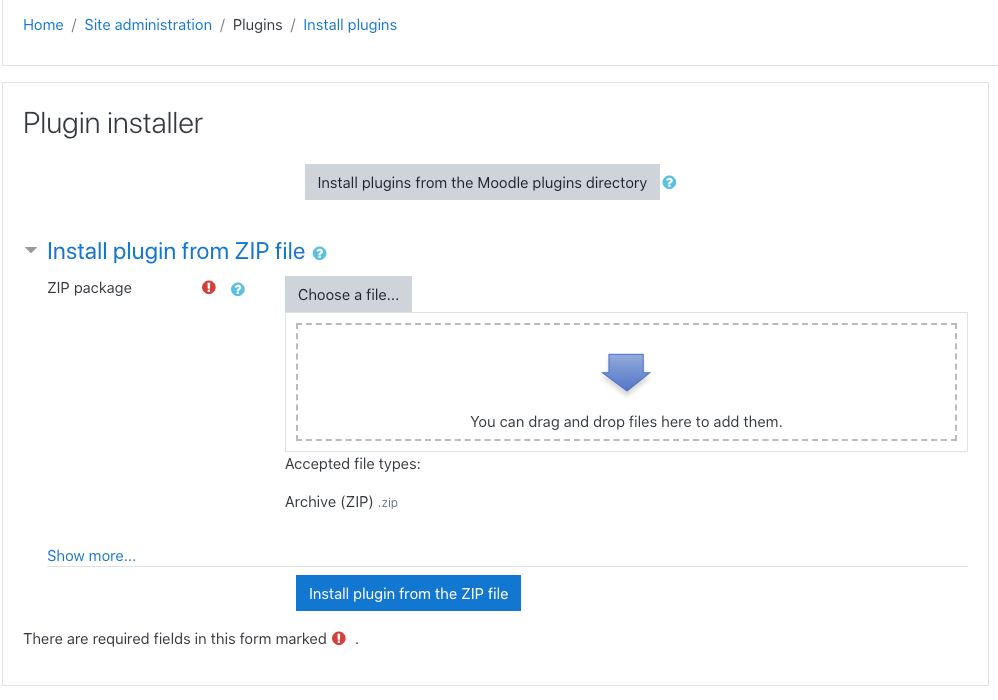
1b. - Install the plugin in Moodle
Log into Moodle as an administrator and then go to the Site administration / plugins area. Go to Install plugins and then upload the MEDIAL filter plugin.
2. Log onto Moodle as an administrator and at the prompt upgrade the Moodle database.
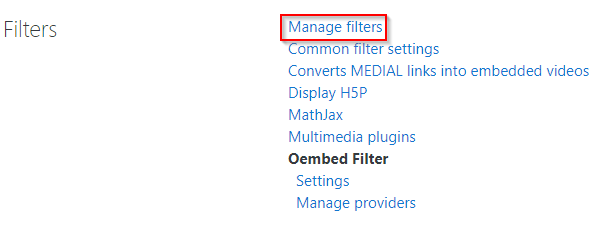
3. Once the database has been upgraded, click on Site Administration and then Plugins. Locate Filters and then click on Manage filters.
4. The filter is called 'Converts MEDIAL links into embedded videos'. Ensure it is set to 'On' and applies to 'Content':

5. In order to allow students to use the MEDIAL plugin in forums, navigate to the following location: Site administration > Plugins > Text editors > ATTO HTML editor > MEDIAL
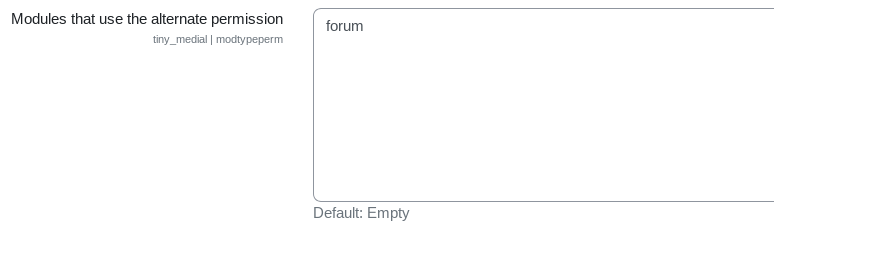
Enter the word 'forum' into the text box at the top called 'Modules that use the alternate permission' and click Save changes at the bottom of the page:

NOTE: If there is a problem with another plugin not functioning correctly after installing the MEDIAL filter plugin, the name of the plugin can be entered into the other box below called 'Use a link to the MEDIAL resource'. Click Save changes, and this should fix the problem with the other plugin:

6. Now when in a forum which is inside a course in Moodle, clicking on 'Add a new discussion topic' will present the ATTO text editor with the MEDIAL plugin button in:

Granting Students and Other Less Privileged Users the Ability to use ATTO/Tiny MCE in Specific Activity Types
In some cases it may be desirable for students to be able to post videos into forums and other activity types. Visibility of the buttons is normally controlled by the tiny/medial:visible and atto/helixatto:visible permissions. Students could simply be given this permission to enable the use of these plugins in the text editor, however, this would give them permission to use it everywhere that they have access to the text editor. It is therefore possible to enable use of the plugin in specific activity types only (typically the forum). To allow for this there are two alternative permissions, which students have enabled by default: tiny/medial:visiblemodtype and atto/helixatto:visiblemodtype. Activity modules can be individually reassigned in the TinyMCE and ATTO configuration to use this permission to determine access to the MEDIAL button instead of the normal one. By default, there are no activity modules enabled for this permission. To enable them, go to Site Admin>Plugins>Text Editors and then either ATTO or TinyMCE Editor and choose MEDIAL. In the "Modules that use the alternate permission" box enter the Moodle component name of the Activity module, without the _mod prefix, one entry per line:
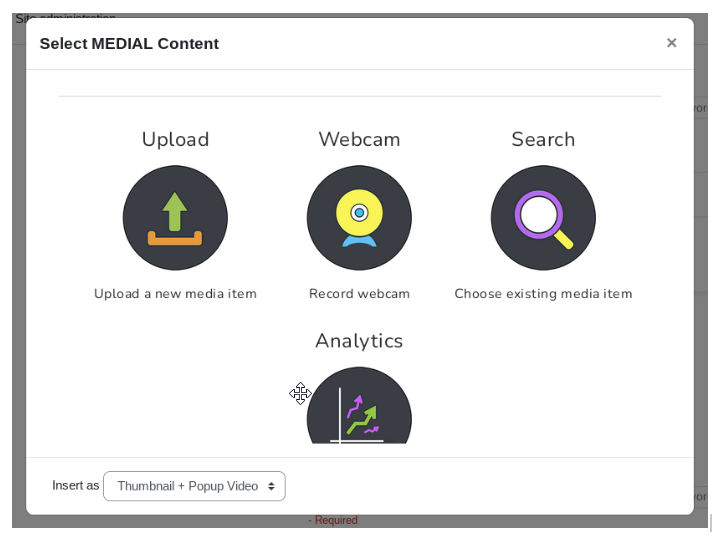
Embed Options - ATTO and TinyMCE Editor
These options allow a user to choose how a video will be displayed on the page. Instead of having all videos displayed in an embedded iframe, this will provide the user with the option to have an embedded thumbnail or a link that will open a popup dialogue that contains the video. This is useful if an instructor wishes to place a large number of videos on the same page, which will significantly degrade the page load performance if they are all added to the page as embedded iframes. Using the popup means the videos only load on demand. To enable this feature, go to Site Admin>Plugins>Text Editors and then either ATTO or TinyMCE Editor and choose MEDIAL. Within the settings, set the Enable embedding options to true:

With this on, an additional drop down will show at the bottom of the insert media dialogue:

|
©2025 Streaming Ltd | |