MEDIALecture
For information about installing the MEDIALecture license and activating the add-on, refer to MEDIALecture Activation.
To use MEDIALecture the user account must have permission to access it. For more information on how to grant access to users and groups to use MEDIALecture see the Security topic.
Launching MEDIALecture
-
Launch the application in MEDIAL by clicking the Record Screen button.
For information on installing MEDIALecture see the Installing MEDIALecture topic.

-
When the application is launched a message will appear.

-
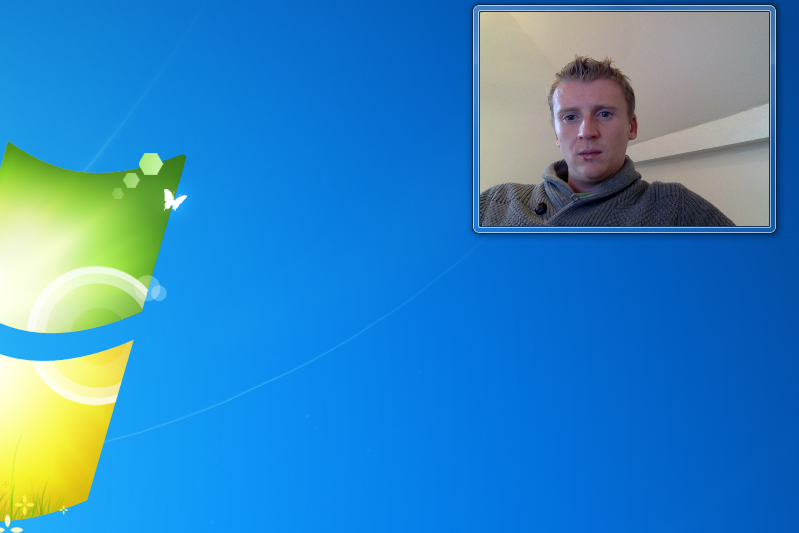
When the application is launched it will appear in the bottom right-hand corner of the screen, and look like this:


Configuring MEDIALecture
To configure the application, click on Settings.

In this section you can make several configuration changes to affect the way that the application behaves.
Local Media Files Storage
This is the path to where the recordings will be saved. If you wish to change this, click on Browse and select an alternative destination.

Select a Webcam
The webcam that the application should use can be selected from the drop-down list, and the quality can also be changed.
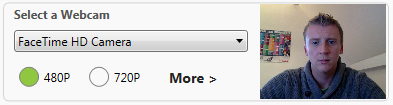
Clicking more will expose more quality options, however it is not recommended to use these due to the way the encoding has been optimized for compatibility in MEDIAL.
Capture Settings
Here the quality can be changed for screen recordings. For the best quality use 1080P. Using Low Capture Mode is not recommended.

Select a Microphone
Here the drop-down list can be used to select the audio input device which MEDIALecture should use for voice input.

Media Upload
Check the box to delete recordings on the local disk of your computer after they have been uploaded. This option is recommended in order to prevent the local disk filling up.

Once all the changes desired have been made click on SAVE to commit them.

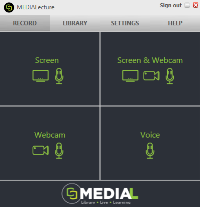
Using MEDIALecture
The application is split up into four different sections:
Screen
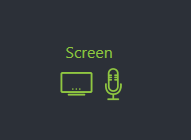
Clicking on Screen will allow you to record your screen, and if you have selected a voice input device in Settings, also record your voice. When you select this option it will present you with the option of whether you would like to record all or part of your screen. If you have multiple monitors attached to your computer it will display them here, allowing you to choose the monitor to record. Leave the default set to record full screen, or choose Select Area to manually select the part of your screen to capture.

Keyboard Controls
Once you have dragged the mouse to the area you wish to record, the presentation will begin. Just before the start of the presentation the following screen will appear, showing the keyboard controls you can use during the recording.

To pause and resume a recording you can use Alt + P. Alt + D will allow you to draw during the recording.
Task Bar
Clicking the MEDIALecture application in the task bar will open the control menu in the bottom right-hand corner of your screen.
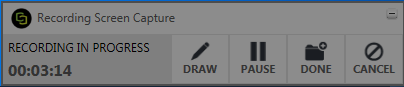
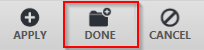
Here you have the option to draw, pause, end the recording by clicking DONE, or cancel the recording to end it but delete it.
Preview Window
Once the recording is complete it will open up in a preview window and start playing through it. The recording is displayed in a film reel at the top of the window, and the progress bar can be dragged across the film reel to seek through the recording.

Editing Options
On the left-hand side of the window there are four options:
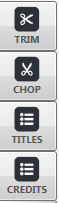
Using these options, the clip can be trimmed, chopped, and titles and credits can be added.
Clicking the TRIM button will place green arrow markers at the start and end of the film reel. These can be dragged through the clip to mark the new desired start and end points.
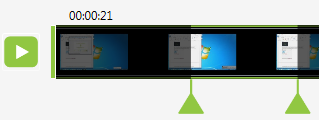
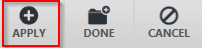
Once these have been set, click on APPLY to save them.
Clicking the CHOP button will place green arrow markers at the start and end of the film reel. These can be dragged through the clip to select the part of the recording to be ‘chopped’ out. The image below shows the section in shadow being cut out of the clip.
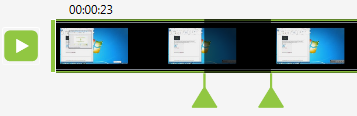
Click APPLY to save the change.
This allows titles to be set that will appear at the beginning of the clip. The first time this button is clicked the designs will be downloaded. Once they have finished downloading you can browse through them using the forward and back arrows.
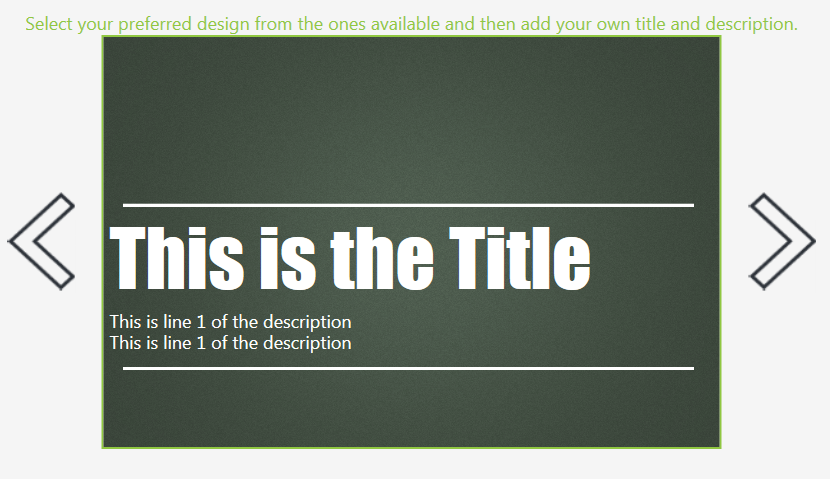
Clicking in the title and description fields allows you to edit them. Click on APPLY to save the changes.
Credits can be added to appear at the end of a recording. This works in the same way as above. Click APPLY to save the changes.
Commit Recording
Once any changes have been made using the buttons as described above, click on DONE to commit the recording.
Edit Recording
To move on and save the changes to your clip click on Edit original recording.
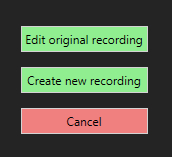
If you want to leave the original recording untouched then click Create new recording and it will apply the edits to a new recording instead of making them to the original.
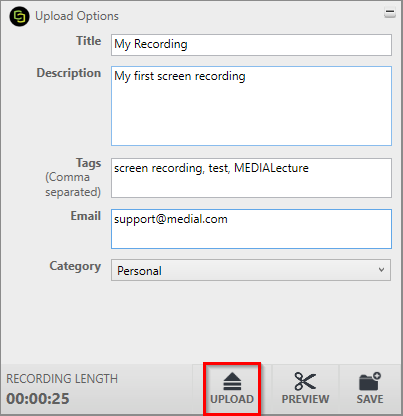
Metadata
Finally metadata for the clip needs to be supplied. This will be the title, description and tags that are displayed for the recording in MEDIAL.
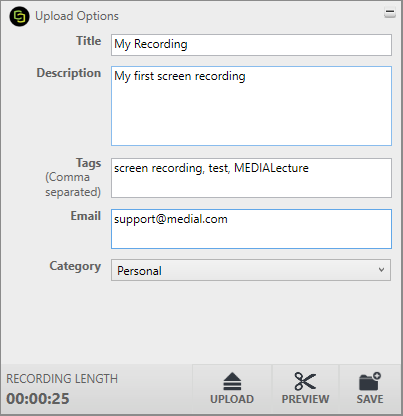
There are three options that can be chosen at this point:
- UPLOAD – This will upload the clip to MEDIAL straight away
- PREVIEW – This allows you to preview the clip, and make any changes to it that may be necessary
- SAVE – Choose this option to save the clip in your local library. It can be accessed at a later time and edited if necessary, and uploaded to MEDIAL at a chosen time
Screen & Webcam

Clicking this option allows you to perform a screen recording whilst capturing your webcam device. The webcam that is used is the one selected in the application settings area. Configure the recording in the same way as described above in the Screen capture section, then start it.
Once it is finished, the clip can be previewed and edited in the same way as described in the Screen capture section above.
Webcam
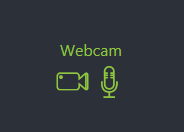
When webcam is selected it captures video and audio input from your chosen webcam and microphone devices. The webcam recording appears in the MEDIALecture window in the bottom right-hand corner of the screen.
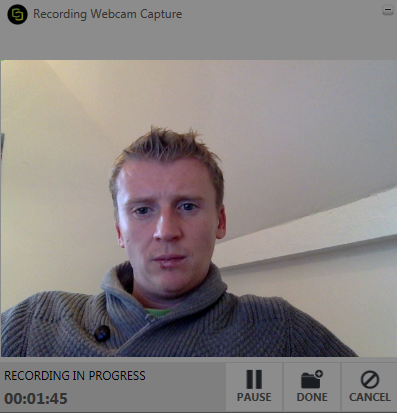
Click PAUSE to pause the recording, CANCEL to start again without saving the recording, and DONE to save it and go to the editing screen. Editing options are explained in the Screen capture section earlier in this document.
Voice
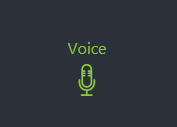
Selecting Voice will capture the sound from your chosen audio input device. The audio device can be selected in the Settings area, as described earlier in this document. The progress is displayed in the bottom right-hand corner of the screen.
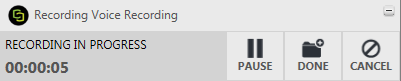
Click on PAUSE to pause the recording, CANCEL to stop the recording and start again, deleting it, and DONE to progress to the Preview screen.
Library
This section displays any clips that have been saved but not yet uploaded to MEDIAL.
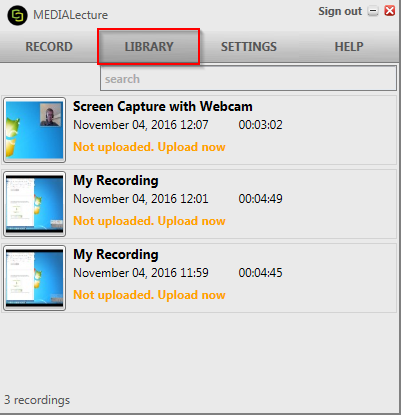
There is a search box to allow searching of recordings if there are a lot in the library.
Hovering over a clip on the list will bring up ‘pen’ and ‘cross’ icons, allowing you to edit a recording or delete it.

To upload a recording click on the ‘Not uploaded. Upload now’ hyperlink in orange.

Before the clip is uploaded the title and description can be edited, and it can still be previewed and edited using the PREVIEW button. Click UPLOAD to upload the clip to MEDIAL.
The recording should appear in your personal category in MEDIAL shortly after being submitted.
Help
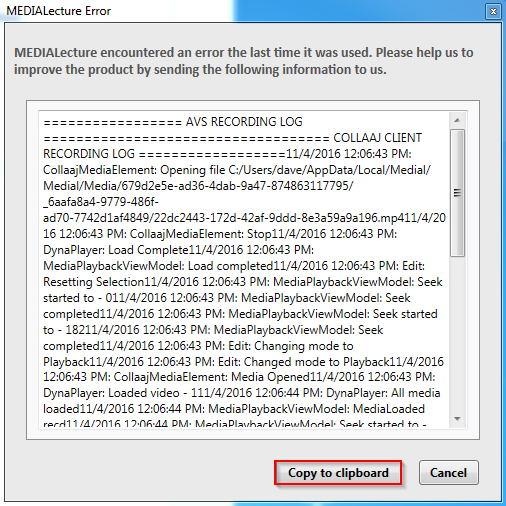
If there are problems with the MEDIALecture application click on the Help menu item.

Here you can click on Collect Logs, and it will allow the logs to be copied to the clipboard so they can be emailed to MEDIAL Support.

|
©2025 Streaming Ltd | |