Content Policies
Content policies allow an administrator to create content retention polices to archive or delete unwanted content from MEDIAL. These policies can be applied to users, groups, categories and courses within an LMS. It allows for content to be archived to a separate location and then later deleted, or deleted from the system immediately. This topic discusses how to configure and administer these policies. To open the Content Policies area log into MEDIAL as an administrator and navigate to the upload/admin site. Click on the Content Policies icon.
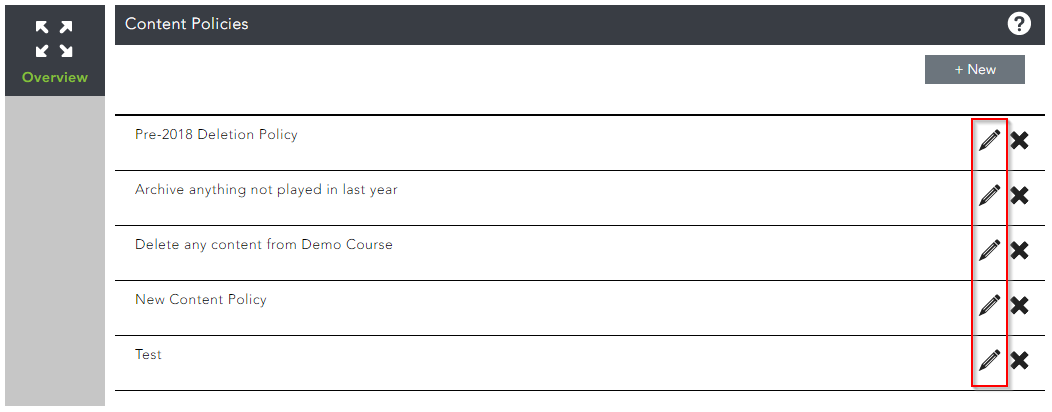
When you open the Content Policies menu you will see the overview screen which will show any existing policies that have been created, or there will be nothing there if none are present and the 'New' button can be clicked to create a new policy. The pencil icon can be clicked on any existing policy to go in and edit it.
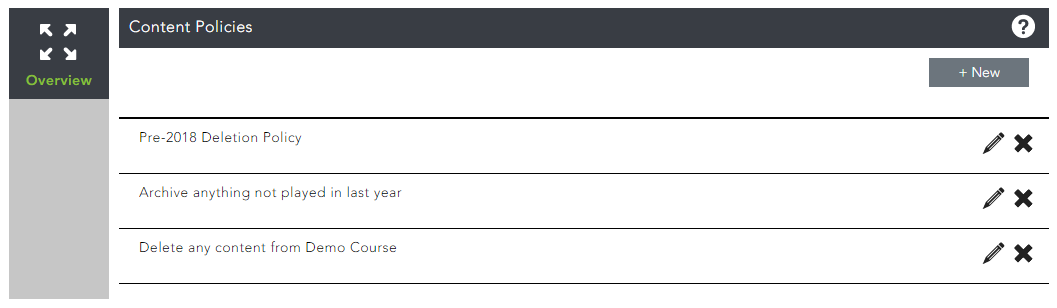
Click on the 'New' button to create a new policy.
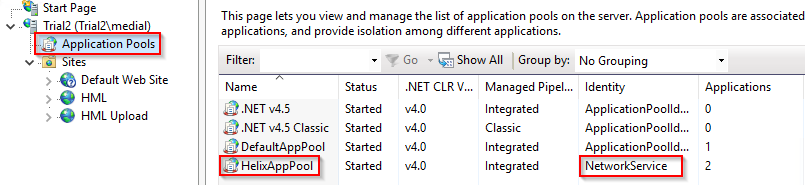
Ensure that before you create your policy you create a physical location for the files to be stored which must support NTFS permissions. This can either be a folder on another disk on the MEDIAL server or network location. Please ensure that MEDIAL has access to it in the security permissions by adding in the account that MEDIAL uses to run under. You can check this on the server by opening Internet Information Services, and then finding the application pool that MEDIAL uses called 'HelixAppPool'. It will show you the account that it uses to run under next to it:
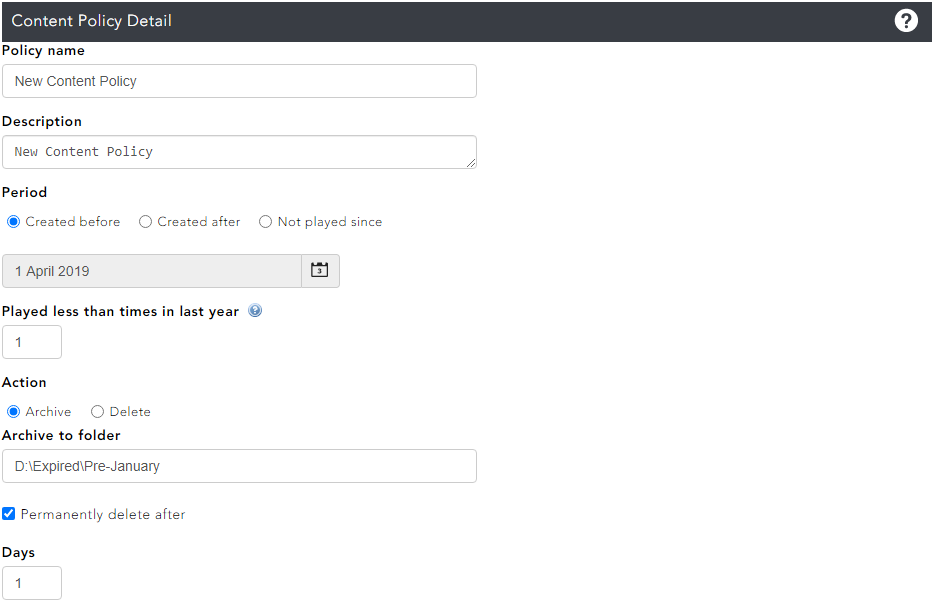
The Content Policy Detail screen will be shown with several fields and options to allow the policy to be created. The following fields and options are displayed in the image further down and are described as follows:
- Policy name - this is the name given to the policy
- Description - describes what the policy does for information purposes
- Period - there are three options: Created before, Created after and Last Played. These are all linked to the date box below it, and a date can be selected by clicking on the calendar icon to bring back content uploaded either before or after a certain date. If the 'Last played' radio button is selected, then the date you provide in the date box will be from that date up until today's date for content that has last been played
- Played less than times in last year - by default this box displays '0' which will return all content from the period you have selected above. If you wish to narrow it down then you can set a value in this box. Entering in a '1' for example will return all the content that has been viewed less than 1 times (i.e. no times) for the date range specified above. If you have selected 'Last Played' then this box will be greyed out
- Action - the options for this are either to archive or delete the content. Enter in a file path for the content to be archived or deleted to. If you select 'Delete', then the view changes slightly and you will need to specify a trash can folder and tell the system the number of days to wait before deleting. When the content is archived there is a check box that can be checked to allow permanent deletion of the content after a set period of time. When the box is checked a 'Days' field will appear, which allows a number of days to be entered in so that the content can be permanently deleted from the disk after the number of days specified.
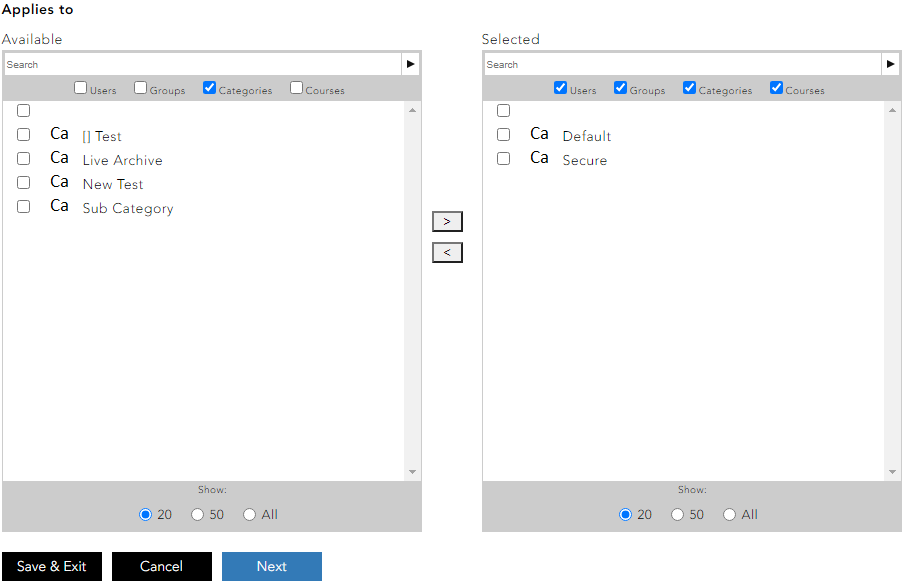
- Applies to - this area is used for selecting all of the areas where the policy applies to. The following options can be checked at the top of the 'Available' side: Users, Groups, Categories, Courses. Checking these or unchecking them will filter the list below accordingly, showing you, for example, just users if only that check box is ticked. Locate all of the entities for the policy to apply to and check the box next to them on the left-hand side to select them, then click on the right arrow to send them over to the 'Selected' area. This can be done in stages, i.e. find the users first and select them, and then the groups etc. after, if there are too many users and groups combined to make searching easy.
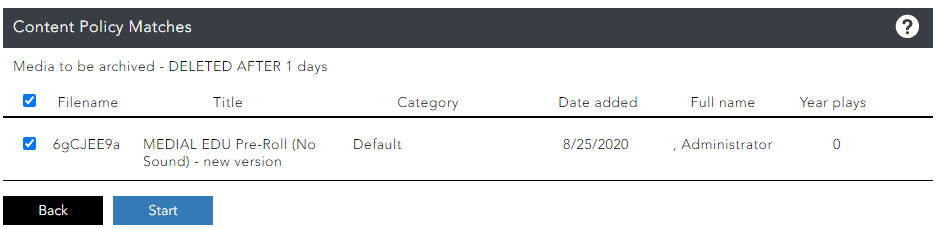
Once everything in the policy is set up correctly, click Next. The screen will then show a list of all the content returned based on the policy. The media items will be displayed over several pages if there are lots of them. The pagination can be changed in the bottom right-hand corner if you wish to display more items per page. In the bottom left-hand corner the pages can be navigated. By default all of the media items will be checked meaning that the policy rules will apply to them. If any content should not be archived or deleted by the policy then it can be unchecked on an individual basis. To uncheck all of the content so the policy rules apply to no media items until they are manually checked, uncheck the box at the top of the list on the first page.
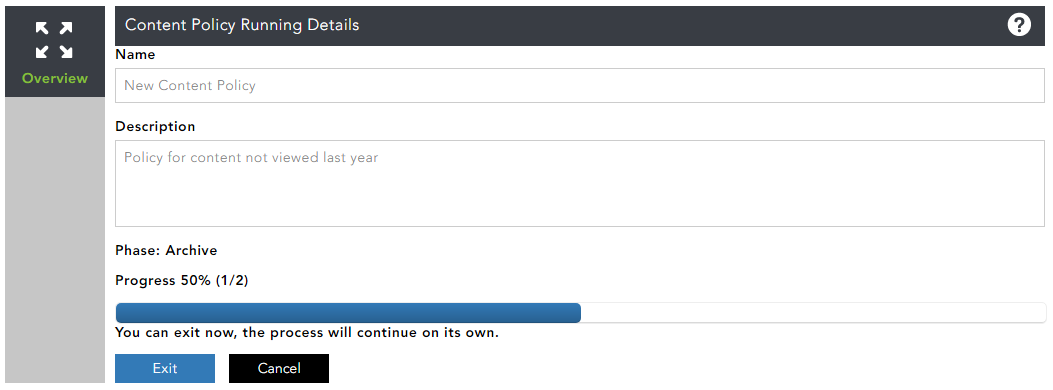
Once the media items for the policy to run against have been correctly selected, click on the Start button. When the Start button is clicked the policy will start running. It will process a media item every 30 seconds, so if there are a lot of items to process this may take some time to complete. The Exit button can be clicked and this will leave the policy running in the background. Clicking Cancel will stop the policy from running and anything that hasn't been processed by the policy will remain in MEDIAL.
To re-run the policy at a later date, the pencil icon can be clicked to edit the policy in the main Content Policies menu, and you can go through and start the policy again to process any remaining content that should be archived or deleted.

|
©2024 Streaming Ltd | |