Moodle-MEDIAL Migration Plugin
This plugin has been provided to enable the migration of content between LTI Sites in MEDIAL so
that content can be moved more easily between two Moodle LMS systems that are connected to the
same MEDIAL server with different LTI sites.
This plugin will migrate content contained in MEDIAL activity modules and will search for
embedded videos created using the ATTO, Tiny and TinyMCE plugins. This plugin does not at
present migrate assignment submissions and feedback.
Please contact support@medial.com for more information on how to download the plugin.
Installation
Either use the Moodle plugin installer, or unzip the contents of the supplied zip file into the
moodle/local directory of your Moodle installation and then go to “Site Admin > Notifications” to
trigger the installation
Configutation
To configure this plugin, either enter values during the installation process when prompted or
navigate to “Site Admin > Plugins > Local Plugins > MEDIAL Video Migration” to set the
parameters.
The configuration page contains two textarea parameters which contain JSON configuration values.
It is important to ensure that you put valid JSON in here, so if necessary you can check the validity
of the JSON using an online checker, eg https://jsonlint.com/
The “Config for the old MEDIAL sites” parameter is the most important. This contains details of
the Moodle sites on which the backups you wish to restore were created. Please fill in each of the
values as per the template below:
[
{"base_url": "The base URL of the Moodle site",
"consumer_key": "The consumer key",
"org_id": "The organisation ID"
}
]
eg:
[
{"base_url": "https://mymoodle.medialibrary.com",
"consumer_key": "123456",
"org_id": "My Moodle"
}
]
Multiple sites can be specified by adding a second data structure separated from the first with a
comma, eg:
[
{"base_url": "https://mymoodle.medialibrary.com",
"consumer_key": "123456",
"org_id": "My Moodle"
},
{"base_url": "https://myothermoodle.medialibrary.com",
"consumer_key": "654321",
"org_id": "My Other Moodle"
}
]
The second parameter - “The db tables and fields that contain html to process” - contains the
database fields that will be scanned to identify MEDIAL embedded resources that were created
using the ATTO, Tiny or TinyMCE plugins.
There are many fields in Moodle where these embeds could exist, including custom ones created by
3rd party plugins. There is no mechanism available in Moodle to automatically identify every single
possible field automatically, so a set of common fields has been included by default that will cover
most core functionality, you will need to configure any others that are required manually. By default
the configuration will include the “intro” field of all activity modules that are were installed at the
point the default configuration was created, the content field of the “Page” activity and the
“Definition” field of the “Glossary” activity.
Using the Plugin
In order to use this plugin to migrate MEDIAL content, first restore the backup of the course you
wish to migrate in the normal way. Once the course has been restored, access the course home page
and click the “More” menu (note, custom themes may have this in a different place):
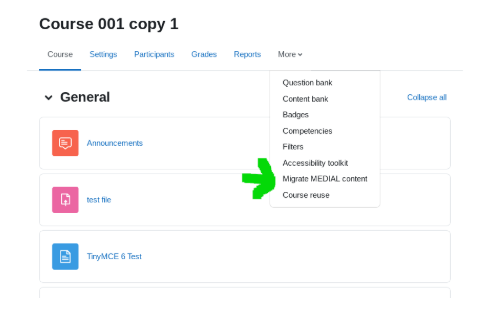
Select the “Migrate MEDIAL content” option. This will open the migration dialogue where you
choose the site the backup came from:
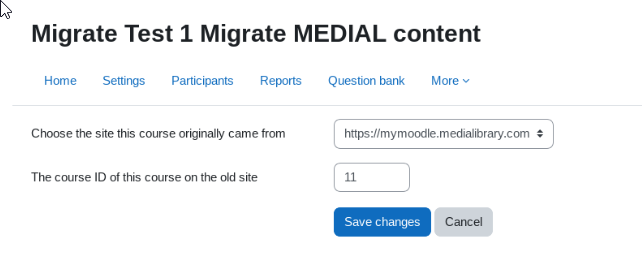
You need to choose the Moodle site on which the backup was created from the drop down menu.
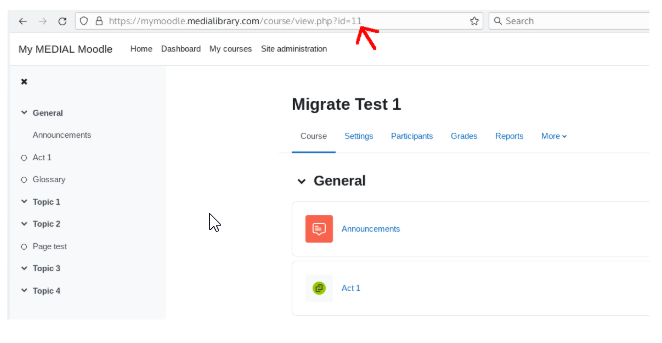
You also need too know the “Course ID” of the course which the backup was created on in the
original Moodle site. This can be found by inspecting the URL of the course on the Moodle site
where the backup was created. Go to the course home page and look at the number at the end of the
url where you will see ?id=<number> . Click “Save Changes” to continue.
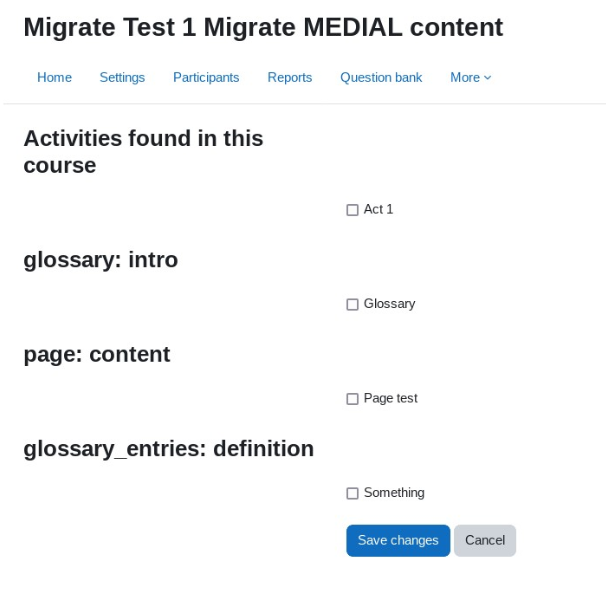
The next dialogue will look for Activity modules and links inside the configured database fields
where ATTO, Tiny and TinyMCE might have created embedded links. Select the resources that you
wish to migrate from the available options and click “Save Changes” to continue.
You will then see a dialogue confirming the migrations that have been undertaken. You may wish to
cut and paste and save a copy of this text as a record of the changes that were made. Should the
migration fail to work as expected, this will help MEDIAL support to debug the problem.
Now go back to the course where the migrated MEDIAL resources are present and check that they
are working as expected.

|
©2024 Streaming Ltd | |