Session Manager
Verify the Flash Virtual Directory
Carry out the following steps to check if the Flash virtual directory exists on the MEDIAL website.
- Click the Windows logo—
 .
. -
Type Internet Information Services and double-click Internet Information Services when it appears.
-
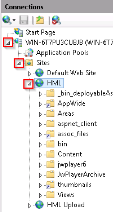
Expand the main IIS server node. In Sites, go to the MEDIAL site.
-
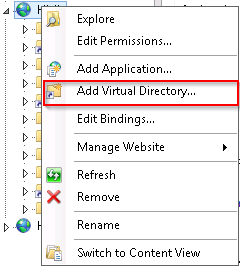
If the Flash virtual directory doesn’t exist, right-click the MEDIAL site and choose Add Virtual Directory.

-
Name the virtual directory Flash and browse to the path of the Flash folder within the MEDIAL content directory.

- Click OK to exit IIS.


Add the Session Manager to Wowza
The procedure explained in this section integrates Wowza Media Server with the MEDIAL session manager.
-
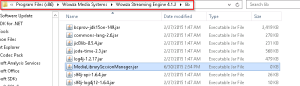
Navigate to the Wowza Media Server installation folder and copy the MEDIALibrarySessionManager.jar file to the /lib folder. Do the same for the MEDIALibraryLiveIncoming.jar file.
-
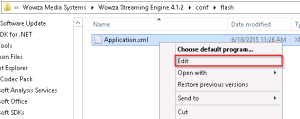
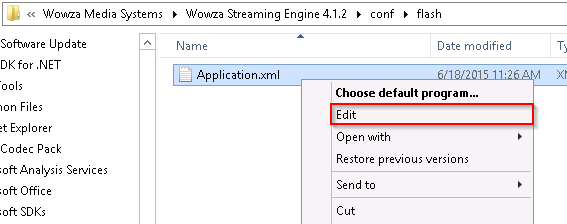
Locate the Application.xml file for the Wowza Flash application in the \Conf\ directory. For example:
C:\Program Files (x86)\Wowza Media Systems\Wowza Streaming Engine 4.1.2\conf\flash
-
Open Application.xml in a text editor.
-
Copy the following text into a new file in your text editor:
<Module>
<Name>SessionManager</Name>
<Description>SessionManager</Description>
<Class>uk.co.streaming.sessionmanager.SessionManager</Class>
</Module> -
Paste the copied text in Application.xml before the closing </Modules> tag so that the file contents look like this:
<Modules> <Module> <Name>base</Name> <Description>Base</Description> <Class>com.wowza.wms.module.ModuleCore</Class> </Module> <Module> <Name>logging</Name> <Description>Client Logging</Description> <Class>com.wowza.wms.module.ModuleClientLogging</Class> </Module> <Module> <Name>flvplayback</Name> <Description>FLVPlayback</Description> <Class>com.wowza.wms.module.ModuleFLVPlayback</Class> </Module> <Module> <Name>SessionManager</Name> <Description>SessionManager</Description> <Class>uk.co.streaming.sessionmanager.SessionManager</Class> </Module> </Modules> -
Copy the following text to your text editor and modify the section of the URL described as BACK_END_MEDIAL_URL below so that it reflects the MEDIAL upload site URL:
<Property> <Name>MedialUrl</Name> <Value>http://BACK_END_MEDIAL_URL/security/MEDIALSessionAuth.aspx</Value> </Property> -
Scroll to the bottom of the Application.xml file and paste the preceding text into the <Properties>...</Properties> section so that it looks like the following, where your upload URL replaces the sample text MEDIAL-upload.domain.com:
<Properties>
<Property>
   <Name>MedialUrl</Name>
   <Value>http://MEDIAL-upload.domain.com/security/MEDIALSessionAuth.aspx</Value>
</Property>
</Properties>
</Application>
The value for the <Name> property is case-specific. Use MedialUrl exactly as shown in the preceding example. The URL used in the <value> property is not case-specific.
- Save and close the Applications.xml file.
- Navigate to the live application in the \Conf\ directory, for example:

C:\Program Files (x86)\Wowza Media Systems\Wowza Streaming Engine 4.1.2\conf\live
10. Open Application.xml in a text editor.
11. Copy the following text into your text editor:
<Module>
<Name>SessionManager</Name>
<Description>SessionManager</Description>
<Class>uk.co.streaming.sessionmanager.SessionManager</Class>
</Module>
12. Paste the copied text in Application.xml before the closing </Modules> tag so that the file contents look like this:
<Modules>
<Module>
<Name>base</Name>
<Description>Base</Description>
<Class>com.wowza.wms.module.ModuleCore</Class>
</Module>
<Module>
<Name>logging</Name>
<Description>Client Logging</Description>
<Class>com.wowza.wms.module.ModuleClientLogging</Class>
</Module>
<Module>
<Name>flvplayback</Name>
<Description>FLVPlayback</Description>
<Class>com.wowza.wms.module.ModuleFLVPlayback</Class>
</Module>
<Module>
<Name>SessionManager</Name>
<Description>SessionManager</Description>
<Class>uk.co.streaming.sessionmanager.SessionManager</Class>
</Module>
</Modules>
13. Copy the following text to your text editor and modify the section of the URL's described as BACK_END_MEDIAL_URL below so that it reflects the MEDIAL upload site URL:
<Property>
   <Name>MedialUrl</Name>
   <Value>http://BACK_END_MEDIAL_URL/security/MedialSessionAuth.aspx</Value>
</Property>
<Property>
   <Name>MedialPublishUrl</Name>
   <Value>http://BACK_END_MEDIAL_URL/wowza/publishAuth</Value>
</Property>
14. Scroll to the bottom of the Application.xml file and paste the preceding text into the <Properties>...</Properties> section so that it looks like the following, where your upload URL's replace the sample text MEDIAL-upload.domain.com:
<Properties>
<Property>
   <Name>MedialUrl</Name>
   <Value>http://MEDIAL-upload.domain.com/security/MedialSessionAuth.aspx</Value>
</Property>
<Property>
   <Name>MedialPublishUrl</Name>
   <Value>http://MEDIAL-upload.domain.com/wowza/publishAuth</Value>
</Property>
</Properties>
</Application>
The value for the <Name> property is case-specific. Use MedialUrl exactly as shown in the preceding example. The URL used in the <value> property is not case-specific.
15. Save and close the Applications.xml file.
Integrate the Playback Application
This procedure integrates the Wowza Streaming Server Recordplayback application with the MEDIAL session manager.
-
Open the Applications.xml file for the Recordplayback application, which is located in the same \Conf\ directory as the Flash XML file. For example:
Wowza_installation_folder\conf\recordplayback\Application.xml -
Make the same changes to it as described in the preceding section, updating the Module and Property sections.
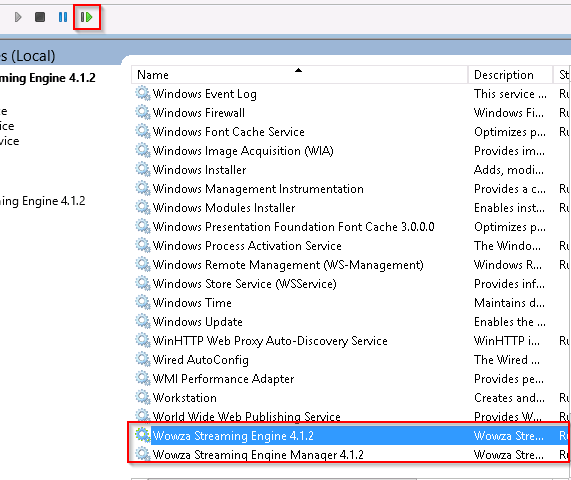
Restart Wowza
Restart both of the Wowza services by opening Windows Services, right-clicking each service, and restarting them in turn.

|
©2025 Streaming Ltd | |