Editing Media
Content that has been uploaded to MEDIAL can be edited in order to change things such as the metadata, the thumbnail, the uploaded file itself and to add or remove associated or captions files. Files can also be edited in order that they can be trimmed, chopped or exported (the whole clip or part of the clip made into a new asset in MEDIAL. If a clip has had captions generated for it automatically from the transcription service then these can be edited.
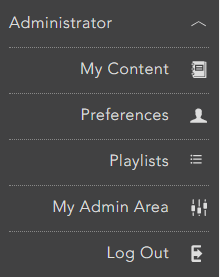
To edit media items, navigate to the content listings page by clicking on the My Account menu in the front end site, and clicking My Content.
Click on the green edit icon for the item you wish to edit.

Re-uploading a File
To re-upload a file for an existing record, click on the green edit icon for the item as shown above. Click on Browse and then locate the new clip you wish to use in place of the current one.
Once the file is uploaded click Next. Make any changes required on the subsequent screens and Finish the process on the confirm screen. Alternatively, if no other changes are required, click on the Confirm tab in the top right-hand corner of the Wizard and click Finish.
Trim, Chop and Export
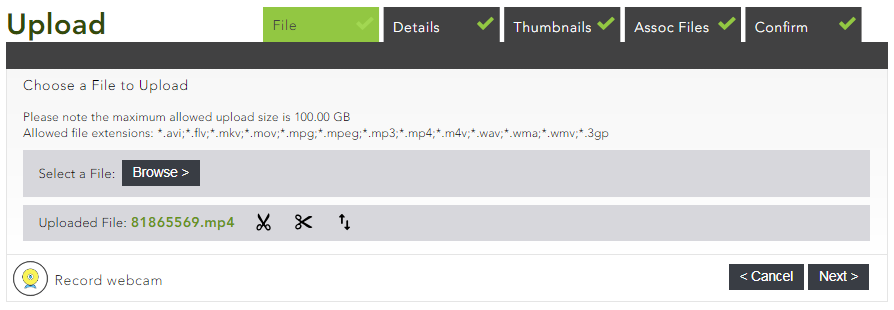
When editing a clip, it can be trimmed, chopped to edit parts out, and exported to make a new media item. On the Upload screen of the upload wizard, the icons to do this are next to the uploaded file name.
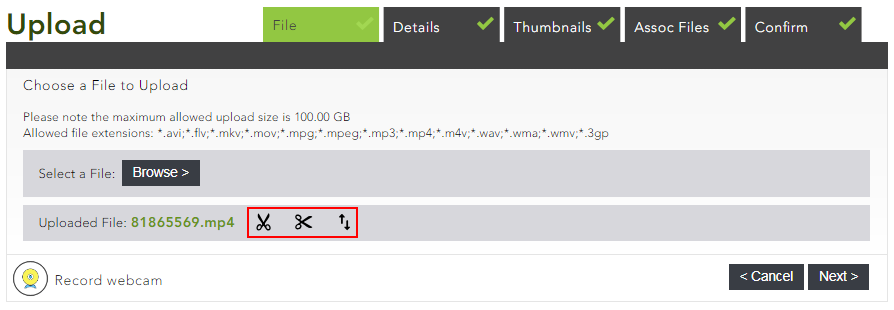
Click on one of the icons to open the trim and chop window. Once the window is open you can change between Trim, Chop, Preview and Export using the side menu bar.
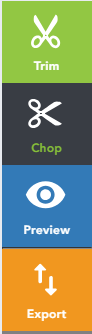
Trim
A clip can be trimmed to remove a section at the beginning and end. To do this click on the upwards scissor icon, and either drag the ends of the green bar to the positions desired, or use the Start and End times to set the desired times for the edited clip to start and end. The number after the dot allows for fine control over the start and end times.
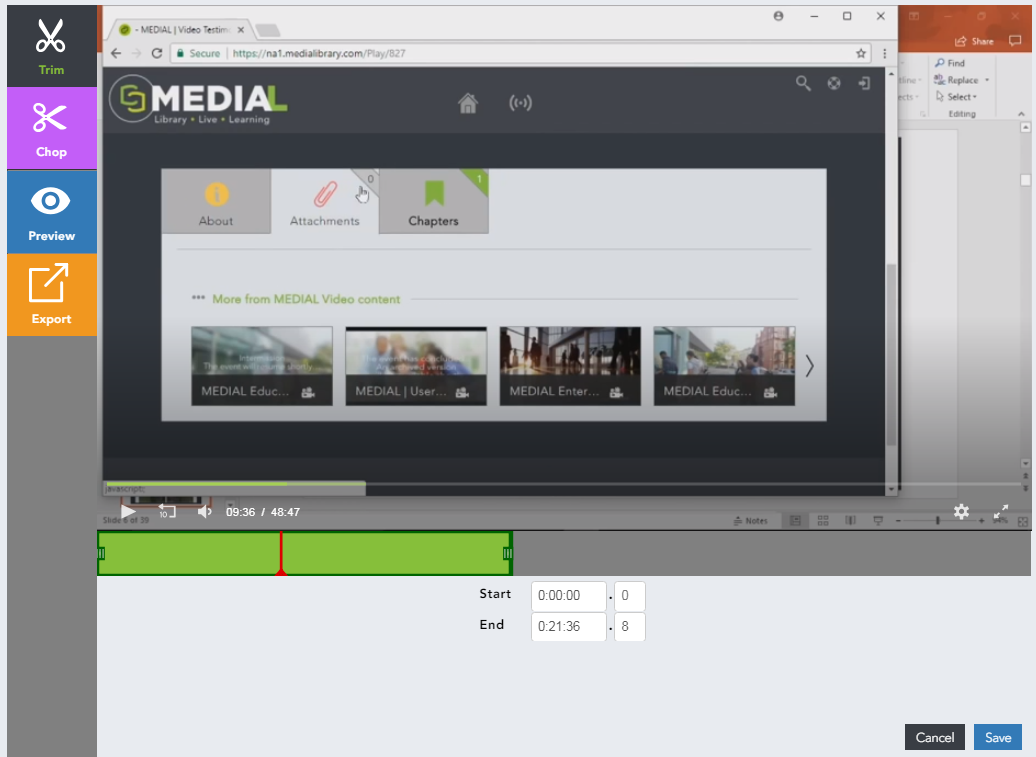
To drag the green bar to the right size, use the 3 vertical lines at each end of the bar.
Click Save when the trim is complete and continue through the upload wizard to complete the process.
When saving the changes to Trim and Chop edits, the original file will be permanently edited. To keep the original file, click export and make any necessary chops, and then save the changes. This will leave the original clip unedited.
Chop
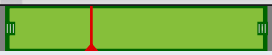
When chopping a clip, play the clip to the point where the chop should be, or move the red line in the green bar to the correct position. Click Add, and then drag the ends of the blue bar to the correct positions to chop the exact section of the clip to be removed. When a chop is added it will be displayed below the green bar. The times can be adjusted to change the chop length, and the number after the dot can be changed to allow for fine control. Multiple chops can be added to edit out different parts of the clip. In the example below, the green bar shows that the clip has already been trimmed, so any chops have to be made inside the green bar. Click on Save to save the edits.
Preview
Using preview you can play the clip to see what it will look like once it has been trimmed and chopped. the green bar is the trimmed clip, with the blue sections representing the chops. Any unsaved edits can be saved by clicking Save.

Export
The Export menu allows a clip to be exported to exist in MEDIAL as a separate content item. A clip can be exported as it is in order to duplicate it, or it can be edited before being exported. This is desirable when a clip needs to be edited, but the original clip has to be kept on the system unedited. When the Export function is used, trims and chops can't be applied using the Trim and Chop menus. Chops can be made on the Export screen by clicking Add, and then adjusting the orange bars in the same way as previously discussed.
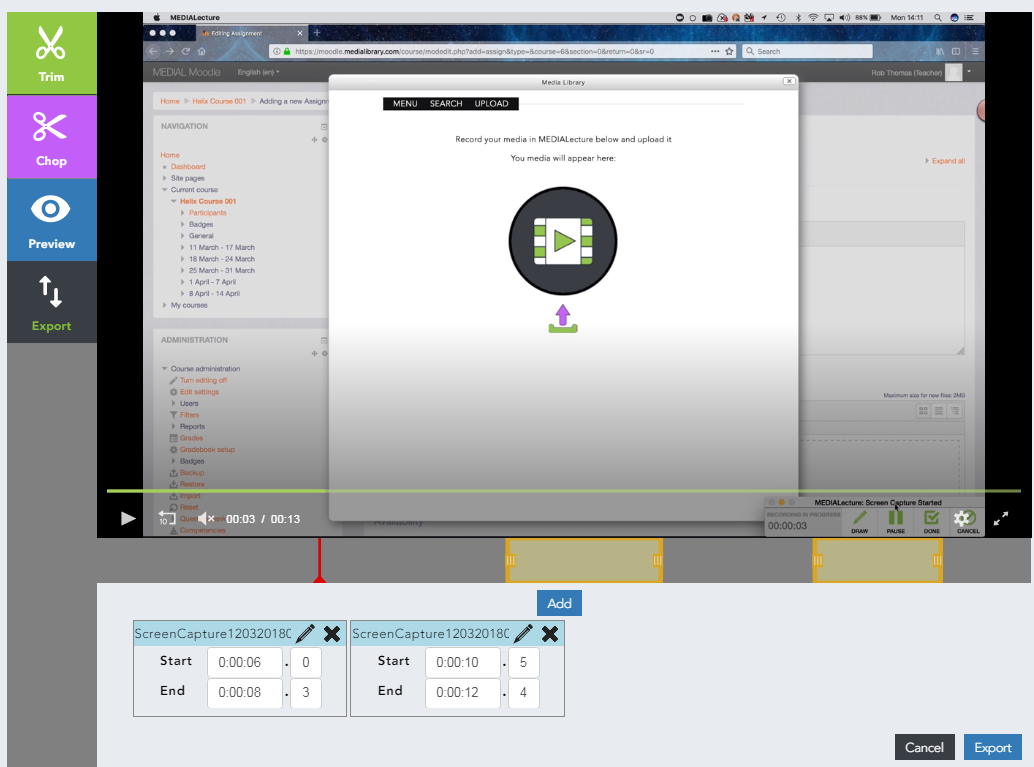
To trim a clip, place a chop at the start and end of the time line at the desired positions. Click on Export to complete the edits and proceed through the upload wizard to finish the process. The exported clip will be encoded and appear as a new clip in MEDIAL.
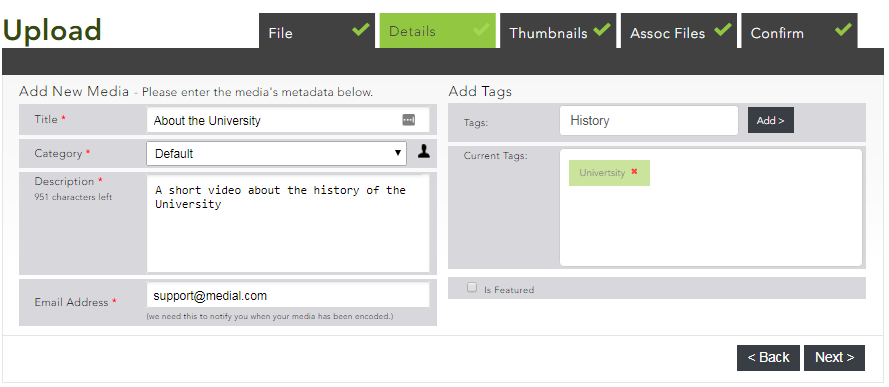
Editing the Metadata
Any of the clip metadata can be edited on the Details tab in the upload wizard. Click next to continue.
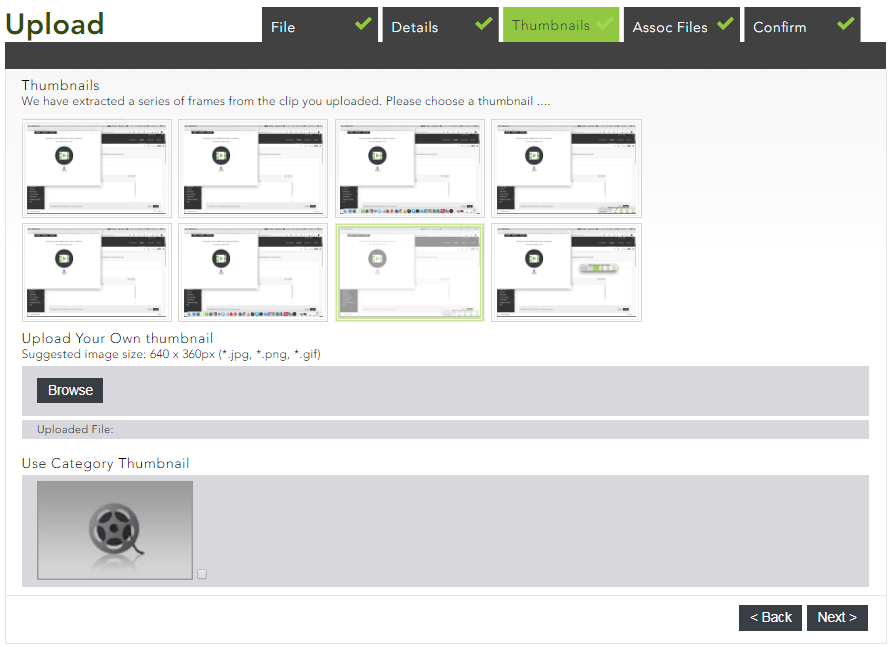
Changing the Thumbnail
On the Thumbnails tab of the upload wizard a new thumbnail can be selected by clicking on the image. You can browse for an image on your computer to upload a different one, or select the category thumbnail if there is one set. The default grey film reel is displayed (and can be used) if there is no category thumbnail set. Click next to continue.
Adding, Deleting Associated Files, and Managing Captions
On the Assoc Files tab of the upload wizard associated files can be added and removed. Current associated files are displayed and can be removed by checking the box next to them and clicking Delete selected files. New files can be added by first entering a title for the file, and then clicking Browse to search for and upload it. A list of allowed file types is shown, and a maximum of 3 associated files, no larger than 10 MB each can be uploaded.
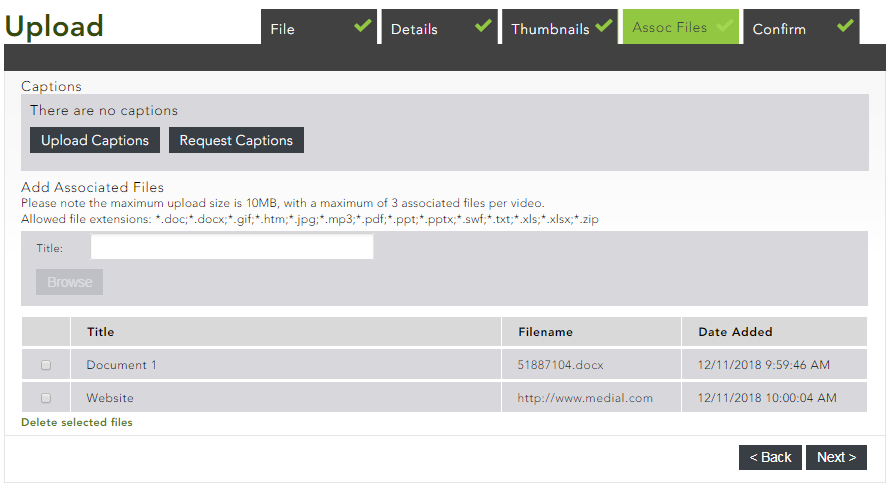
If captions have not already been requested for the clip, they can be by clicking Request Captions. In order to request captions, the user must have the Captions permission applied to their account. Administrators have the ability to do this automatically. Captions files can be uploaded for a clip if they have been manually generated. When the Upload Captions button is clicked an upload button is presented which can be clicked to allow the captions file to be located on the local machine and uploaded for the clip. .srt, .vtt and .dfxp file types are allowed.

If automatic captions have already been generated for the clip by the captions provider it will display information about when the captions were generated, and who requested them. They can be deleted by clicking on the red trash can icon, or edited by clicking on the pencil icon.

When the pencil icon is clicked, an editor window will open. The clip can be played, and as it plays the captions will appear below it. On the right-hand side of the window the current captions text for that point in the clip is highlighted in green.

The list of captions on the right-hand side is paginated, and can be navigated using the numbers at the top. Each caption snippet can be clicked on to skip directly to it. In the Edit caption window below the video, the text can be edited. Once the text has been edited click on the Continue button to save the changes and continue playing the video. Once all of the edits have been made click on Finish.
On the Assoc Files tab of the upload wizard click Next.
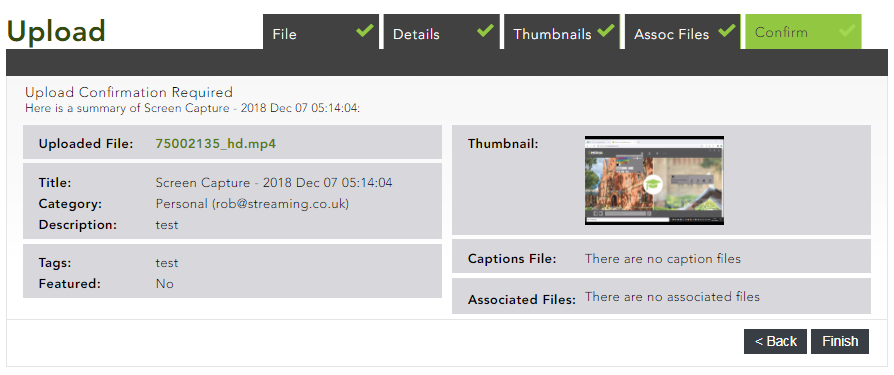
Confirm
The Confirm tab shows an overview of all the information associated with the clip. At this point any changes can be made by clicking the Back button or by clicking on the tabs at the top. To complete the editing process, click on Finish.

|
©2025 Streaming Ltd | |