MEDIAL Upgrade, Version 5
Before beginning the upgrade process, ensure that you have the installers and necessary license keys for both MEDIAL and the Wowza Media Server. If you need to obtain the latest version of the MEDIAL installer, log on to the self-service portal or contact the support team.
Before you begin
Before beginning the upgrade process, ensure the following:
- The MEDIAL installer and v5 license key are present on the server.
- The streaming URL is using a separate IP address to the media library websites.
In version 5 of MEDIAL, the content is delivered using Adaptive Bitrate Streaming. In order to do this Wowza needs to be configured to deliver content securely over port 443 if the media library websites also use SSL. For a more complete guide to the prerequisites required for a v4 to v5 upgrade please look at the prerequisite guide.
Bindings
Only follow the instructions in this section if the streaming URL will be configured to deliver content over port 443. If port 8080 is going to be used, skip to the next section. For more information on the considerations when choosing between ports 443 and 8080, see the section Wowza Secure Streaming.
-
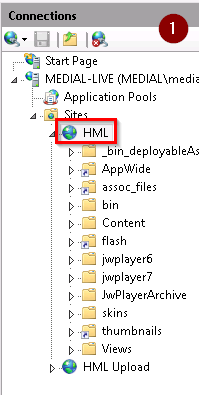
Open Internet Information Services.
-
Expand the server node, and then the sites node. Click on the HML site.
-
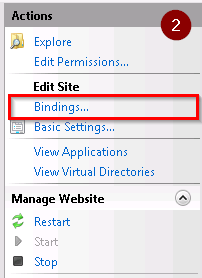
In the right-hand side of the window click on Bindings…
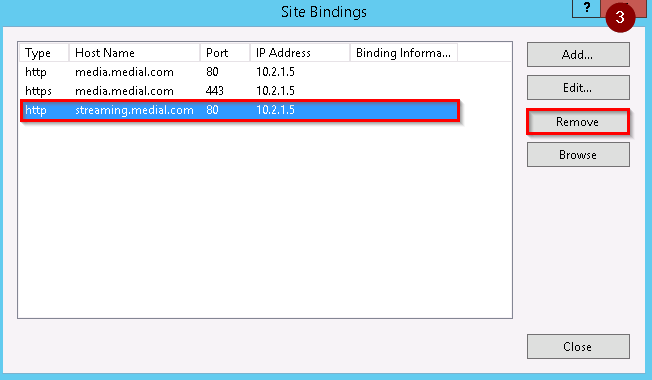
- Click on any bindings that are present for the streaming URL.
-
Click Remove for each binding.

- Open a command prompt with administrator privileges by right-clicking and choosing Run as Administrator.
-
Run the following command to remove the streaming IP address from the IIS bindings, replacing IP address with the streaming IP address for your streaming URL:
netsh http delete iplisten ipaddress=10.2.3.5
-
Restart the services using the following commands in the command prompt:
net stop http /y
net start http
net start w3svc - Close the command prompt.
Back Up the VLS Database
If the host server is a virtual machine, it is strongly recommended that a snapshot be taken prior to upgrading in addition performing to the backup tasks below. The snapshot can be deleted once a successful upgrade is confirmed.
Do not proceed without backing up the VLS database. If the upgrade fails the database backup will be required to roll back to the previous version.
-
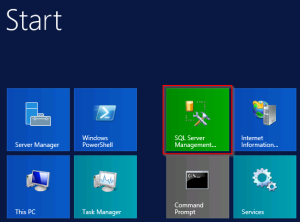
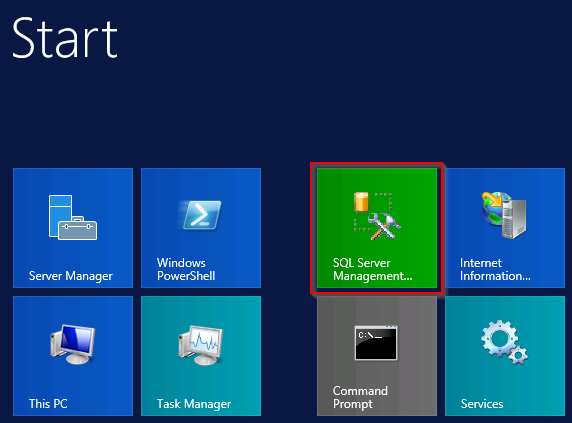
Locate and open the SQL Server Management Studio Express.
-
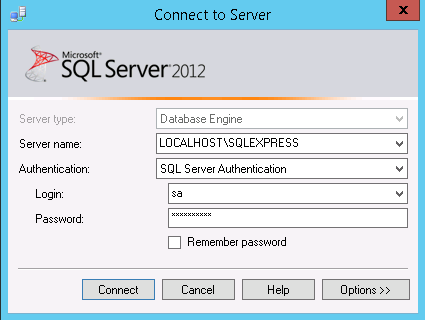
Click Connect to log in.

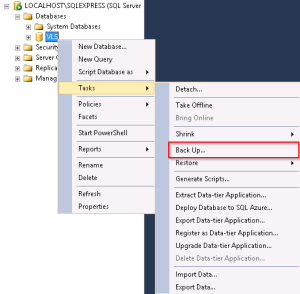
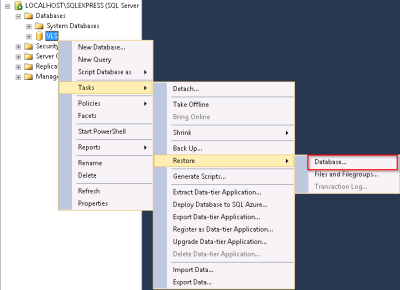
- Expand the Databases folder, and then right-click on the VLS database, go to Tasks and then click on Back Up...
-
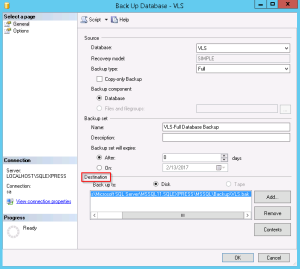
In the window that opens, check the destination, as this is where the backup will be created. To change this, click Remove, and then Add. Enter the alternative path for the backup to be created in.
-
Click on Options, and then check the box to verify the backup once it is complete.

- Click OK, and when the backup completes click OK on the notification box.
- Exit SQL Management Studio.


Back up the Media Library
This is a mandatory step. If the upgrade fails it will only be possible to restore back to the old version if BOTH the web sites and the database backups are present.
- Load Services by clicking on Start and then Run.
- In the box type services.msc and then click OK.
-
Locate and stop the HMLService by right-clicking it and selecting Stop.

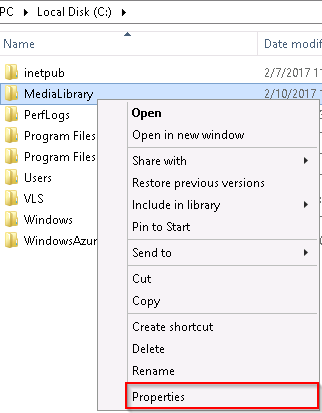
- Locate your Media Library installation. The default location is C:\MediaLibrary.
-
Take a copy of the folders within the Media Library folder (or the folder that holds your sites) and place them in a backup location.


Wowza Secure Streaming
In version 5 of MEDIAL, secure streaming is supported. It can be configured in the following 2 ways:
Considerations:
- If one IP address is being used for MEDIAL and Wowza, and the MEDIAL websites are running over SSL, the Wowza server will need to be moved over to a separate IP address in order to use port 443.
- Progressive download streams being delivered from the Wowza URL through IIS will need to be moved to the front end site address.
- Implementing this option will affect any Flash audio embed code that has been embedded outside of MEDIAL, and also any download links that have been hard-coded any web pages.
This option can be used if problems will arise with implementing SSL with Wowza on port 443. Considerations:
- This option means that there is very little change needed in the setup of MEDIAL, and Flash legacy embed code and download links will continue to work
- Port 8080 must be opened on the corporate firewall for playback to work externally
Configuring Wowza for Secure Streaming
The following steps describe how to generate and install a secure socket layer (SSL) certificate for Wowza.
Complete the steps in this section only if a NEW certificate is being generated for Wowza
The steps below describe the process of creating and completing a CSR using the Java keytool on the command line. An alternative method of creating the certificate request would be to generate the CSR in IIS. Once it has been signed by a trusted authority, the steps in the section Importing an existing certificate into Wowza can be used to change the certificate type to a .jks and import it into Wowza.
To configure Wowza for secure streaming:
-
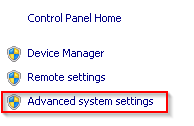
On the server, right-click Computer/My Computer and click on Properties. In the System window that opens click on Advanced system settings.
-
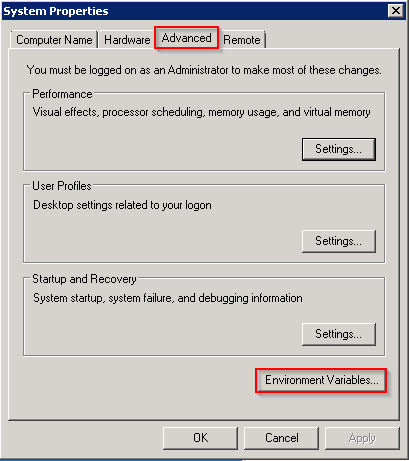
In the System Properties window click on the Advanced tab, and then Environment Variables…

-
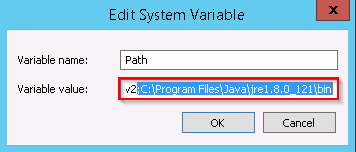
In the System Variables section, find the Path variable and double-click it to open it. In the Variable value field, add the path to the bin directory of your Java installation (this gets installed by default when Wowza is installed) at the end of the list of other variables, after a semicolon. For example:
C:\Program Files\Java\jre1.8.0_121\bin
- If this has been set correctly, you should be able to run the keytool command from a command prompt.
Create a keystore (.JKS) and certificate signing request (.CSR)
Only complete the steps in this section if a NEW certificate is being generated for Wowza
- Open a command prompt as administrator and navigate to the [install-dir]\conf directory of your Wowza installation.
-
Execute the following command to create a keystore (.JKS) and a private key (within the keystore), changing the name of the keystore according to the name of the certificate being generated. In the example below, ssl.mycompany.com.jks is the name of the keystore:
keytool -genkey -keysize 2048 -alias wowzaprivatekey -keyalg RSA -keystore ssl.mycompany.com.jks
-
After this command, you will be prompted to answer several questions in order to complete the CSR. The following example assumes the domain name for the certificate request is ssl.mycompany.com:
[Enter keystore password]
  password
[What is your first and last name]
  ssl.mycompany.com
[What is the name of your organizational unit]
  Web Department
[What is the name of your organization]
  My Company Name
[What is the name of your City or Locality]
  Oxford
[What is the name of your State or Province]
  Oxfordshire
[What is the two-letter country code for this unit]
  GB
[Enter key password for <password>]
password -
Create a CSR by executing the following command:
keytool -certreq -file ssl.mycompany.com.csr -alias wowzaprivatekey -keyalg RSA -keystore ssl.mycompany.com.jks
Submit the .CSR to a certificate authority
After the .CSR file has been generated (it will be in [install-dir]/conf/), it can be submitted to the security authority. In most cases this will mean using a text editor to open it and copy out the contents into the web form on the certificate issuers’ website. Once the request has been processed you will be issued with a certificate.
Import the certificate to the keystore
- Open a command prompt as administrator and navigate to [install-dir]/conf/.
-
Execute the following command in order to determine the format of the certificate:
openssl x509 -in ssl.mycompany.com-2016-07-13-111324.cer -text
The command output specifies the Public Key Algorithm, such as rsaEncryption, and the format, such as X509v3.
-
Execute one of the following commands to import the signed certificate that you received from the certificate authority:
-
For a chain certificate:
keytool -import -alias [user-friendly-name] -trustcacerts -file [filename-of-chain-certificate] -keystore ssl.mycompany.com.jks
-
For a new certificate:
keytool -import -alias wowzaprivatekey -trustcacerts -file [filename-certificate] -keystore ssl.mycompany.com.jks
Importing an existing certificate into Wowza
Complete the following steps if an existing certificate is being used for Wowza.
- Locate the certificate .pfx file (i.e. stream.domain.com.pfx) and copy it into a directory on the server.
-
Download a tool called KeyStore Explorer. The official site for KeyStore Explorer is http://keystore-explorer.org/.
Ensure the official site is used for the download of KeyTool explorer. Streaming Ltd accepts no liability for the download and or installation of any third party applications.
-
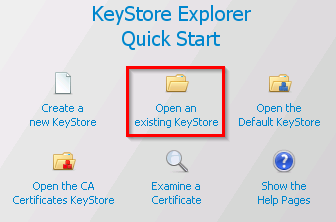
Install KeyTool Explorer to the desired location and then open the application. Close the Tip of the Day box and then click the Open an existing KeyStore button.
- Locate the certificate .pfx file copied to the server previously, select it and click Open.
- Enter the password for the certificate at the prompt and click OK.
-
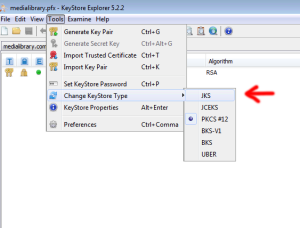
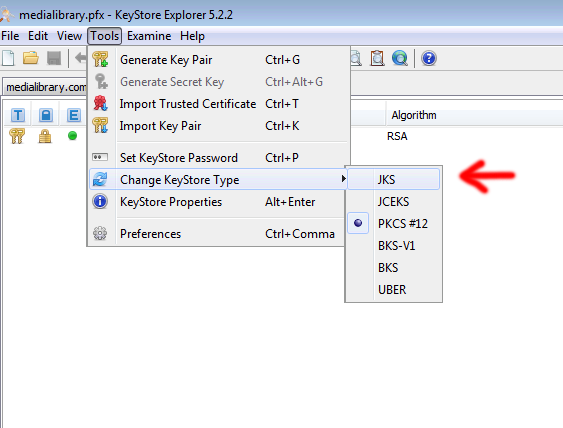
Select the certificate by clicking it once, and then click on Tools, Change KeyStore Type and then choose JKS.
-
Ensuring that the certificate is still highlighted, click on File, and Save As. In the window that opens, navigate to the Wowza [install-dir]/conf/ directory, then change the Save as type drop-down box to KeyStore Files, and give the file a friendly name, using the .jks file extension, as in mycertificate.jks.

Configure a <HostPort> to use the certificate
Depending on whether you want to configure Wowza to stream securely over port 443 or 8080, the host port needs to be configured accordingly.
-
Open the [install-dir]/conf/VHost.xml file in a text editor in order to make the following changes:
-
Uncomment the <HostPort> definition for port 443. This entry follows the comment <!-- 443 with SSL -->. Be sure to remove the comment before <HostPort> and after </HostPort>.
The <Port>...</Port> section needs to contain either 443 or 8080 depending on how you want secure streaming to work.
-
Set the value SSLConfig/KeyStorePath to:
${com.wowza.wms.context.VHostConfigHome}/conf/ssl.mycompany.com.jks -
The following example shows what the <HostPort> section should look like for the <!-- 443 with SSL --> section.
<HostPort>
<Name>Default SSL Streaming</Name>
<Type>Streaming</Type>
<ProcessorCount>${com.wowza.wms.TuningAuto}</ProcessorCount>
    <IpAddress>192.168.1.10</IpAddress>
    <Port>443</Port>
    <HTTPIdent2Response></HTTPIdent2Response>
    <SSLConfig>
<KeyStorePath>${com.wowza.wms.context.VHostConfigHome}/conf/mycertificate.jks</KeyStorePath>
    <KeyStorePassword>password</KeyStorePassword>
    <KeyStoreType>JKS</KeyStoreType>
    <SSLProtocol>TLS</SSLProtocol>
    <Algorithm>SunX509</Algorithm>
    <CipherSuites></CipherSuites>
    <Protocols></Protocols>
-
- Set the SSLConfig/KeyStorePassword to the key store password entered earlier when creating the .jks file.
- Restart your Wowza Streaming Engine.
Securing Live Channels
So that live channels that have been created in MEDIAL can only be streamed at the time they are scheduled for, and only if they exist on the system, some additional configuration needs to be carried out on the Wowza Streaming Engine.
-
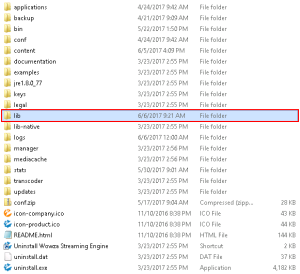
Download the JAR file below and put it into the [wowza root]\lib folder on your server:
http://dev.medialibrary.com/builds/MediaLibraryLiveIncoming.jar
-
Open the Application.xml file at the following location in Notepad:
[wowza]\conf\Application.xml -
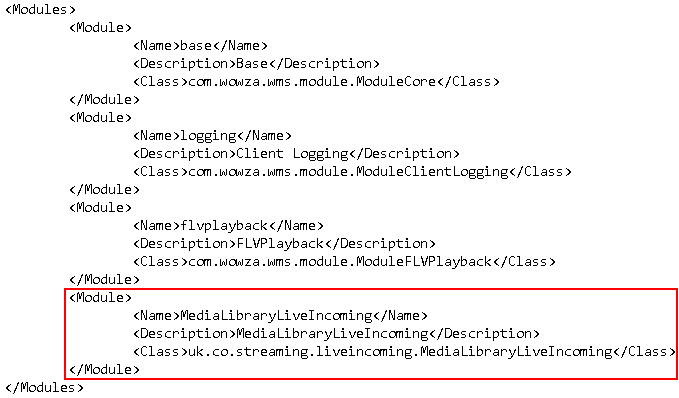
Copy the three lines below and paste them between the tags <Modules></Modules>.
<Module>
   <Name>MediaLibraryLiveIncoming</Name>
   <Description>MediaLibraryLiveIncoming</Description>
   <Class>uk.co.streaming.liveincoming.MediaLibraryLiveIncoming</Class>
</Module>
It will look like the following example:

-
Below the end <Modules> tag, paste the following text inside the <Properties></Properties> tags:
<Property> <Name>MedialPublishUrl</Name> <Value>http://my.server/wowza/PublishAuth</Value> </Property> -
Change upload.domain.com to the MEDIAL upload site domain name. It should look like the following example:

-
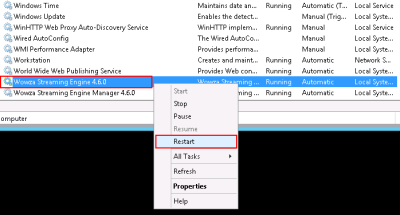
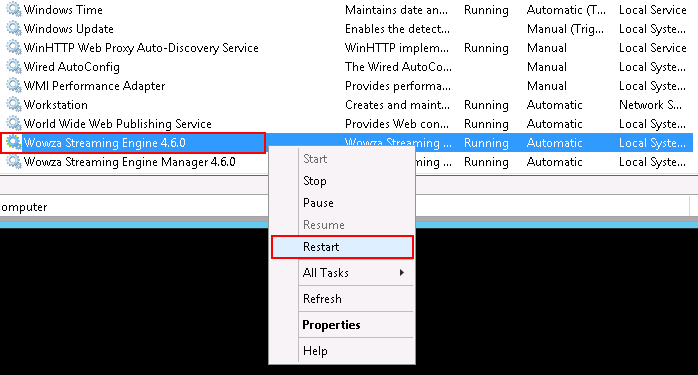
Open Services in Windows, then locate and restart the Wowza services.


Upgrade MEDIAL
Before proceeding with the upgrade, ensure you have the version 5 license ready.
To upgrade MEDIAL:
-
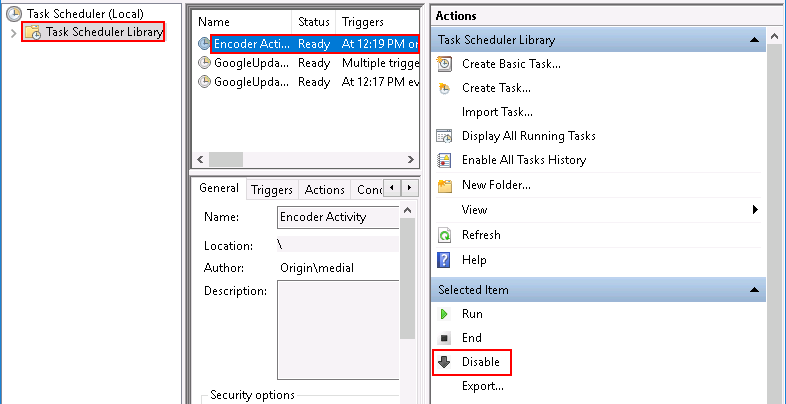
Locate Task Scheduler and open it.

-
Click on the top node. Select the Encoder Activity task. Click Disable.

If the task is running you will need to wait until it returns to Ready before disabling it.
- Minimize the Task Scheduler window.
- Download the version 5 installer and license. Unzip the package if necessary.
- Navigate to the license folder in the media library installation directory (for example, C:\medialibrary\license) and delete any licenses that are in the folder.
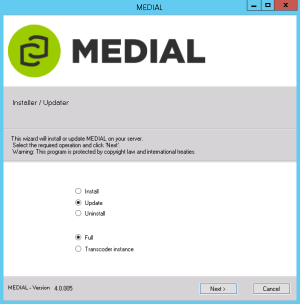
- Launch the installer by right-clicking it and selecting Run as Administrator.
-
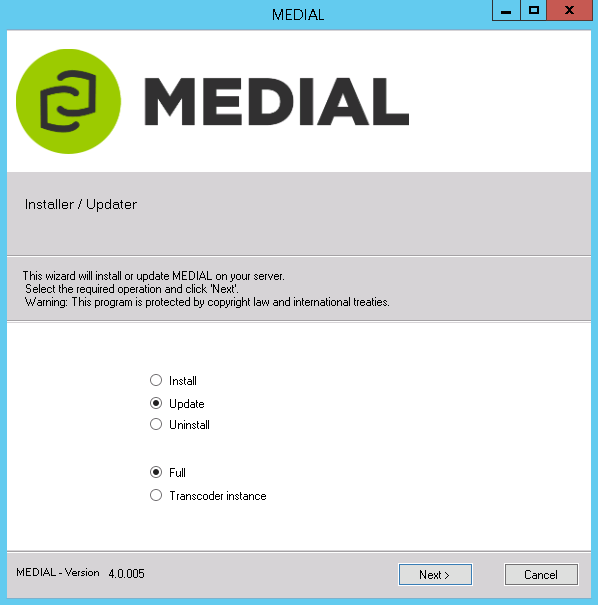
Select the Upgrade radio button and leave the installation type on Full.
-
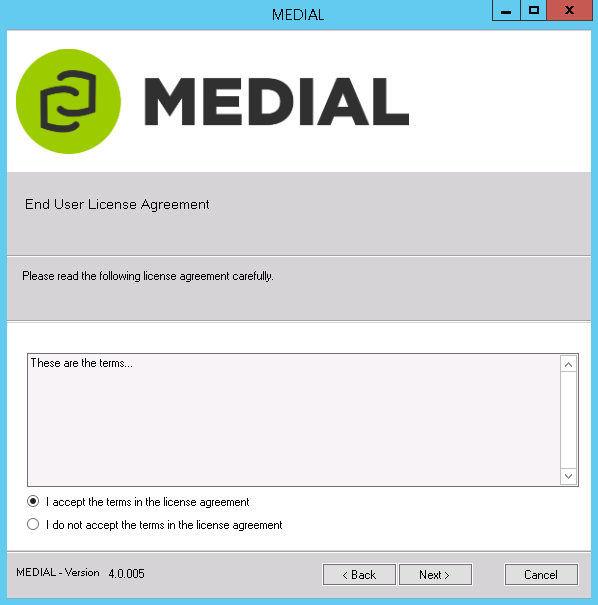
To proceed, click accept the license agreement and click Next.

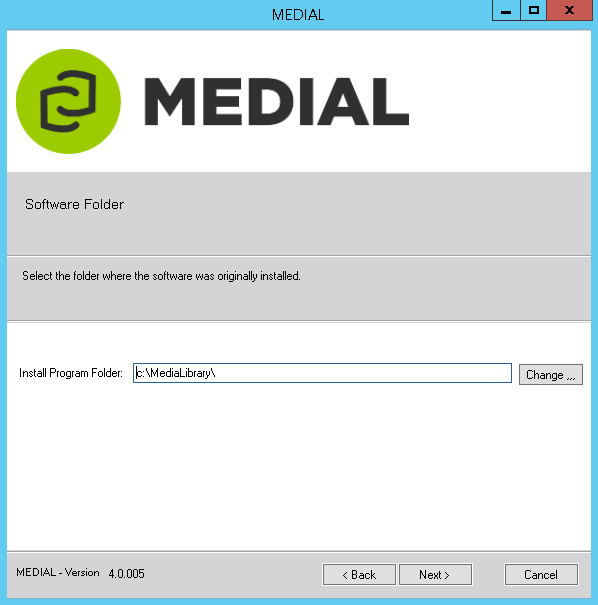
-
If the media library is installed in a different location to the default, click Change and locate it.

-
Supply credentials of an account that has permissions to run the upgrade.
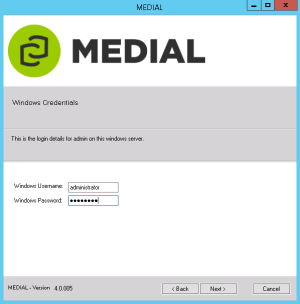
This account is used for running the encoder scheduled task, so an account that does not expire should be used.
If the account is a domain account, prefix it with the domain, as in domain\username.
- Click Next.
-
Once the upgrade is complete, click Finish to close the window.


Changing the Playback Port in MEDIAL
Once the upgrade is complete, the streaming port needs to be changed in MEDIAL to the port being used to deliver the content. If necessary, the playback type also needs to be changed to HTML5.
- Log into MEDIAL as an administrator and then navigate to the upload/admin site.
-
Go to the Settings Menu.

- Expand the Website Settings accordion.
-
Ensure the playback method is set to HTML5:

-
Expand the URL References accordion and then enter either 443 or 8080 for the RTMP port field, depending on the port being used by Wowza for playback.


Configuring Playback Methods in the VLS Database
MEDIAL can be configured to use a primary playback method along with subsequent fallback methods. The methods that are supported are:
- AdaptiveHls
- AdaptiveFlash
- BasicHls
- BasicFlash
- MpegDash
The default order of playback is as listed above, but it can be changed as desired, and any unwanted methods can be removed so they are never tried.
Basic Flash audio will not work over SSL if the front-end MEDIAL site is also using SSL. If this is the case the Adaptive Flash delivery method should be used instead.
Changing the Playback Order
To change the order in which the playback methods are used, the database needs to be edited.
Use caution when accessing and editing the database. Only attempt changing the data as described in the following instructions.
- Log onto the server hosting the VLS database, and log into SQL Server Management Studio.
- Locate the VLS database and open it so that the tables are listed.
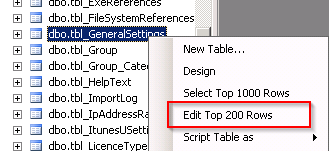
- Locate the General Settings table.
-
Right-click it and click Edit Top 200 Rows.
-
Make the changes to the SourceOrder field by changing the position of the playback methods or deleting any as necessary.
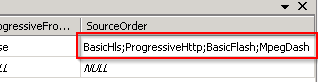
Clicking outside of the field will save the changes.
Generating SMIL Files for Flash Files
Once MEDIAL is upgraded to version 5, SMIL files need to be generated for the existing Flash files in order for adaptive bitrate (ABR) streaming to work.
The SMIL file generator tool can be downloaded from http://dev.medialibrary.com/builds/smilFileCreator.zip.
- Once the file has been downloaded, extract the contents.
-
In a separate Windows explorer window, navigate to the install directory of MEDIAL, and open the VLS folder. Open the web.config file in Notepad and locate the SQL connection string:

-
Copy out the connection string, taking the whole string between the double quotes as shown in the example below:

-
In the other Windows explorer window containing the unzipped SmilFileCreator package, open up the file called SmilFileCreator.exe.config in Notepad.

- Replace the example connection string with the one copied from the VLS web.config file, save the changes and then close the file.
-
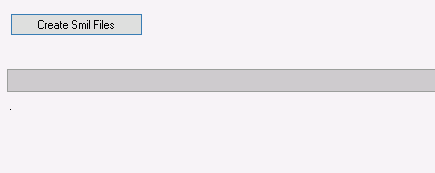
Double-click the SmilFileCreator.exe application to run it.

-
Click on Create Smil Files.
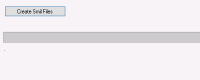
A message will be displayed once the SMIL files have been created successfully.
- Close the application down using the red ‘X’ in the top-right hand corner.
-
Once the SMIL file generation is complete, maximize the Task Scheduler window.
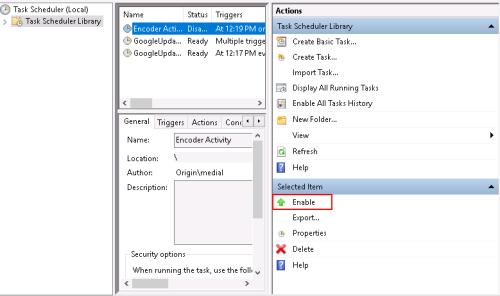
-
Click on the Encoder Activity scheduled task and click Enable.


How to Roll Back an Unsuccessful Upgrade
This section explains how to roll back to the previous version of the media library if the upgrade was unsuccessful or if there a problem with the software following the upgrade.
To begin the process of rolling back the media library:
- Click on Start, then Administrative Tools, and open Services.
-
Stop the service called HMLService.

- Navigate to the Media Library installation directory. Rename the current installation, for example, from C:\MediaLibrary to C:\MediaLibraryFAILED, and create a new installation directory such as C:\MediaLibrary.
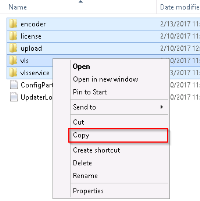
-
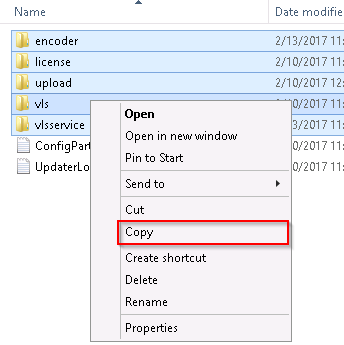
Restore the backed up media library installation to the original location (for example, C:\MediaLibrary) by copying over all the folders previously copied earlier in this document (vls, upload, license, vlsservice and encoder).
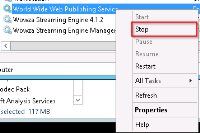
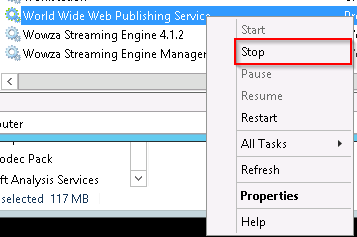
-
Open Services again and locate and stop the World Wide Web Publishing service.
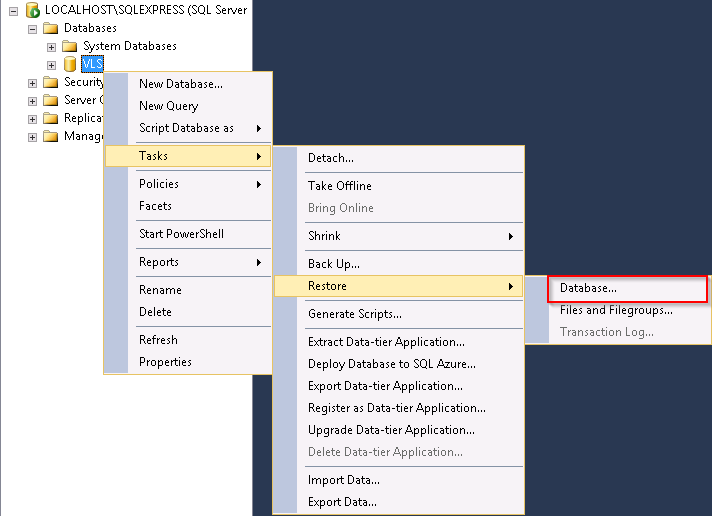
- To restore the previous VLS database, log into SQL Management Studio and expand the server node, and then the databases node.
-
Right-click the VLS database, then click Tasks, then Restore, and then Database…
-
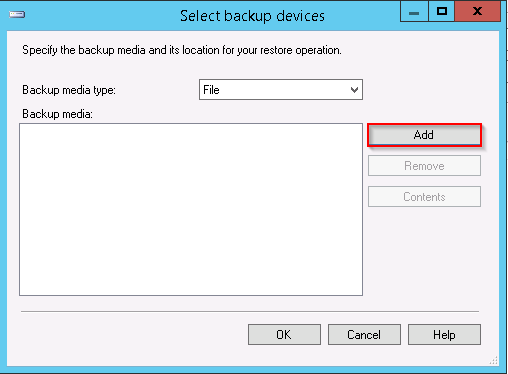
In the Restore Database window that opens, select From device… for the source and then click the ellipsis to select the backup made prior to upgrading.

-
Click the Add button.

-
Locate the VLS backup.

-
Check the box in the Restore column for the backup once it has been selected.

-
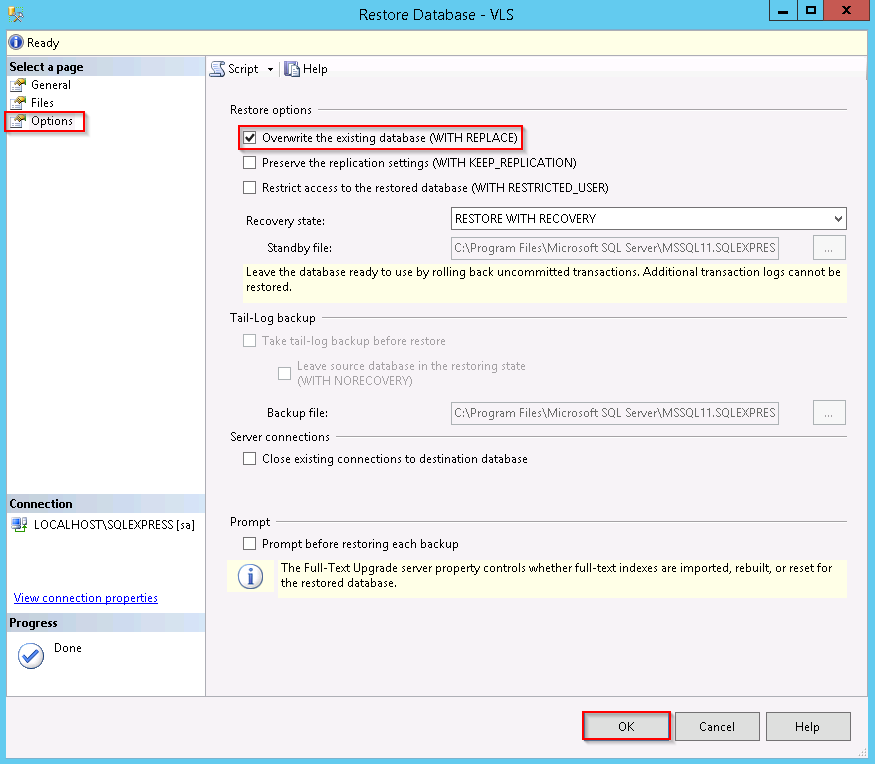
Click on Options, then check the box to Overwrite the existing database (with replace). Click OK to restore the database.

- Exit SQL Management Studio.
- Load Services by clicking Start, Administrative Tools, Services.
- Start the World Wide Web Publishing and HML Service.
-
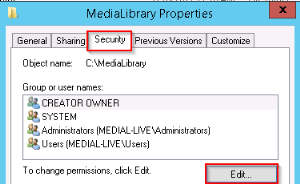
Set the permissions on the Media Library installation directory by navigating to it (for example, C:\MediaLibrary) and then right-clicking it and selecting Properties.

-
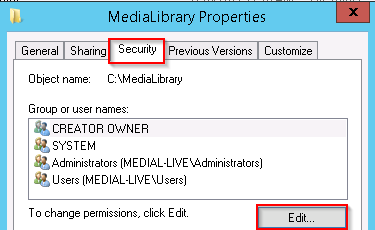
Click on the Security tab. Check to see if the Network Service account is listed in the access list. If the account is present ensure it has Read & Execute rights. If it isn’t present in the list do this:
-
Click Edit.
- In the window that appears, click Add.
-
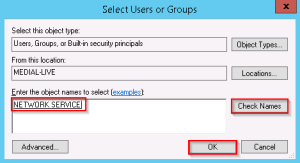
Enter the name of the account and click Check Names. In this case type network service. Click OK.
-
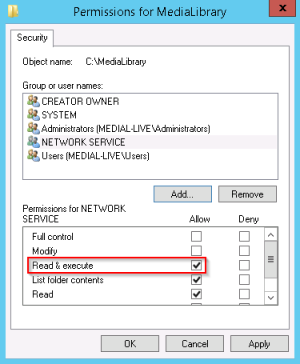
Select the Network Service account and check the box to allow Read & Execute permissions, then click OK.
-
- Click OK on the Properties box to exit.
- The MEDIAL restore should now be complete. Load the sites to check they are fully working.


Changing the Wowza Configuration Back
If the installation has failed and MEDIAL is being restored back to version 4, the Wowza SSL configuration needs to be changed back to its previous state.
- Open the vhost.xml file in the following location in notepad: [install-dir]/conf/VHost.xml
- Locate the SSL section and, as shown in the example below, comment out the <HostPort> section.
-
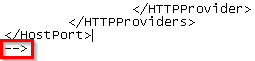
Directly above the opening <HostPort> tag enter: <!--

-
Directly below the end <\HostPort> tag, enter: -->
The other Wowza configuration for securing channels does not need to be undone, as this won’t affect the functionality with the previous version of MEDIAL.
Re-bind the Streaming URL in IIS
This only needs to be carried out if the Wowza Streaming Engine was configured to use port 443 for secure content delivery.
- Open a command prompt with Administrator privileges (Right-click, Run as Administrator).
-
Run the following command to add the streaming IP address from the IIS bindings, replacing the IP address with the streaming IP address for your streaming URL:
netsh http add iplisten ipaddress=10.2.1.5
-
Restart the services using the following commands in the command prompt:
net stop http /y
net start http
net start w3svc - Close the command prompt.
-
Open Internet Information Services. Expand the server node, and then the sites node. Click on the HML site.
-
In the right-hand side of the window, click on Bindings…
-
Click on Add. Leave the type set to http, and select the IP address of the DNS name of the streaming URL.
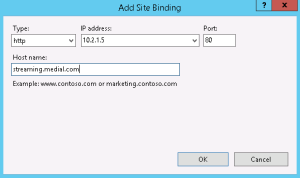
- Click OK.


|
©2025 Streaming Ltd | |